MongoDB
Creating MongoDB
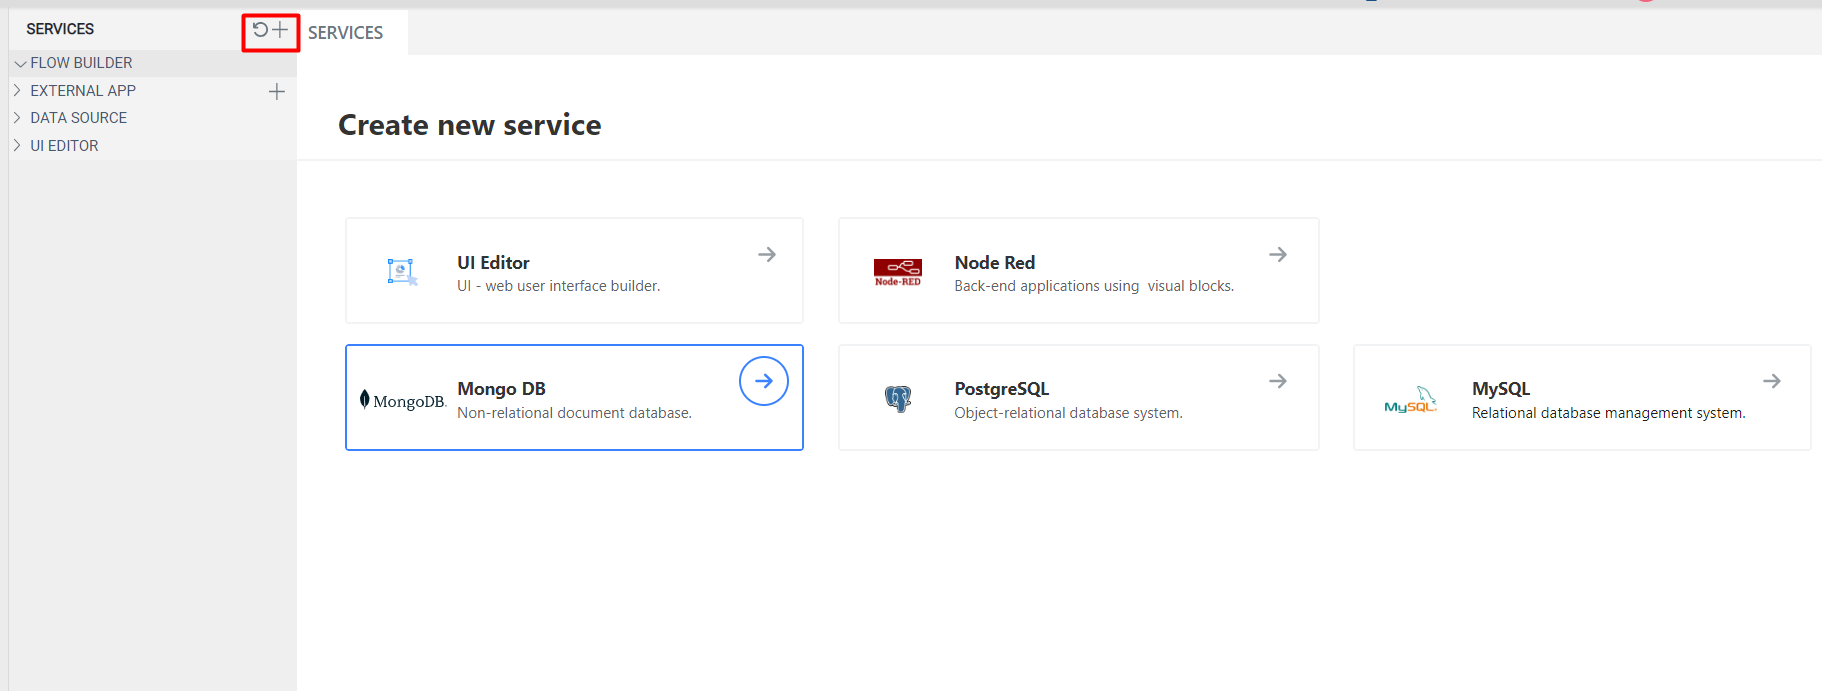
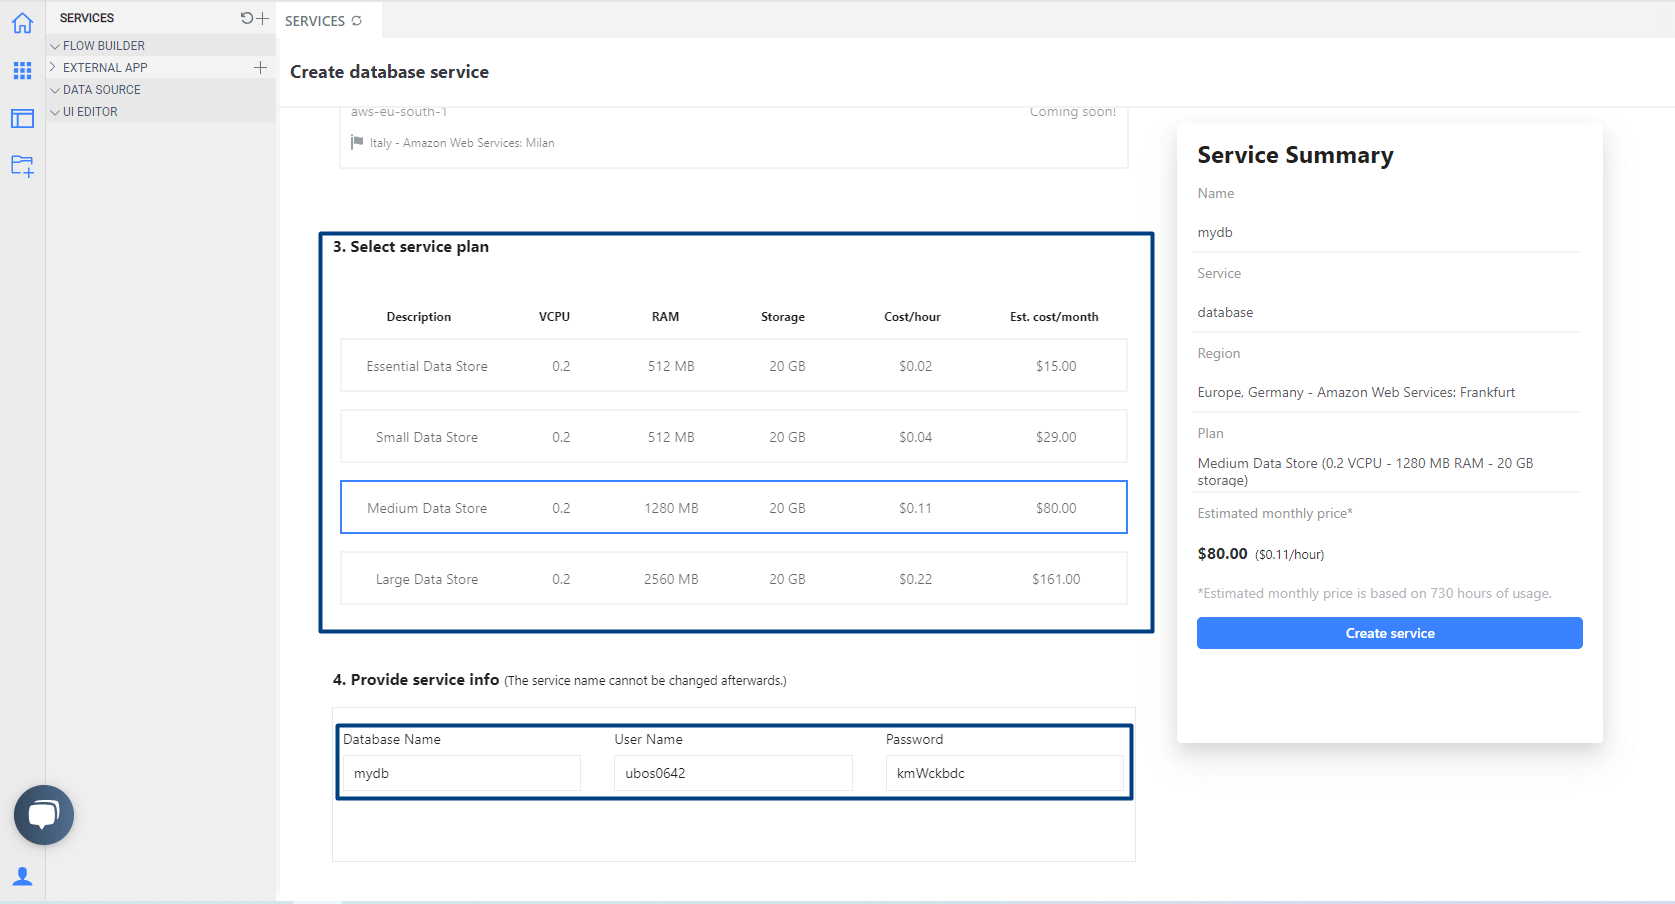
To begin, select a plan and provide a name, username, and password for your new MongoDB database.
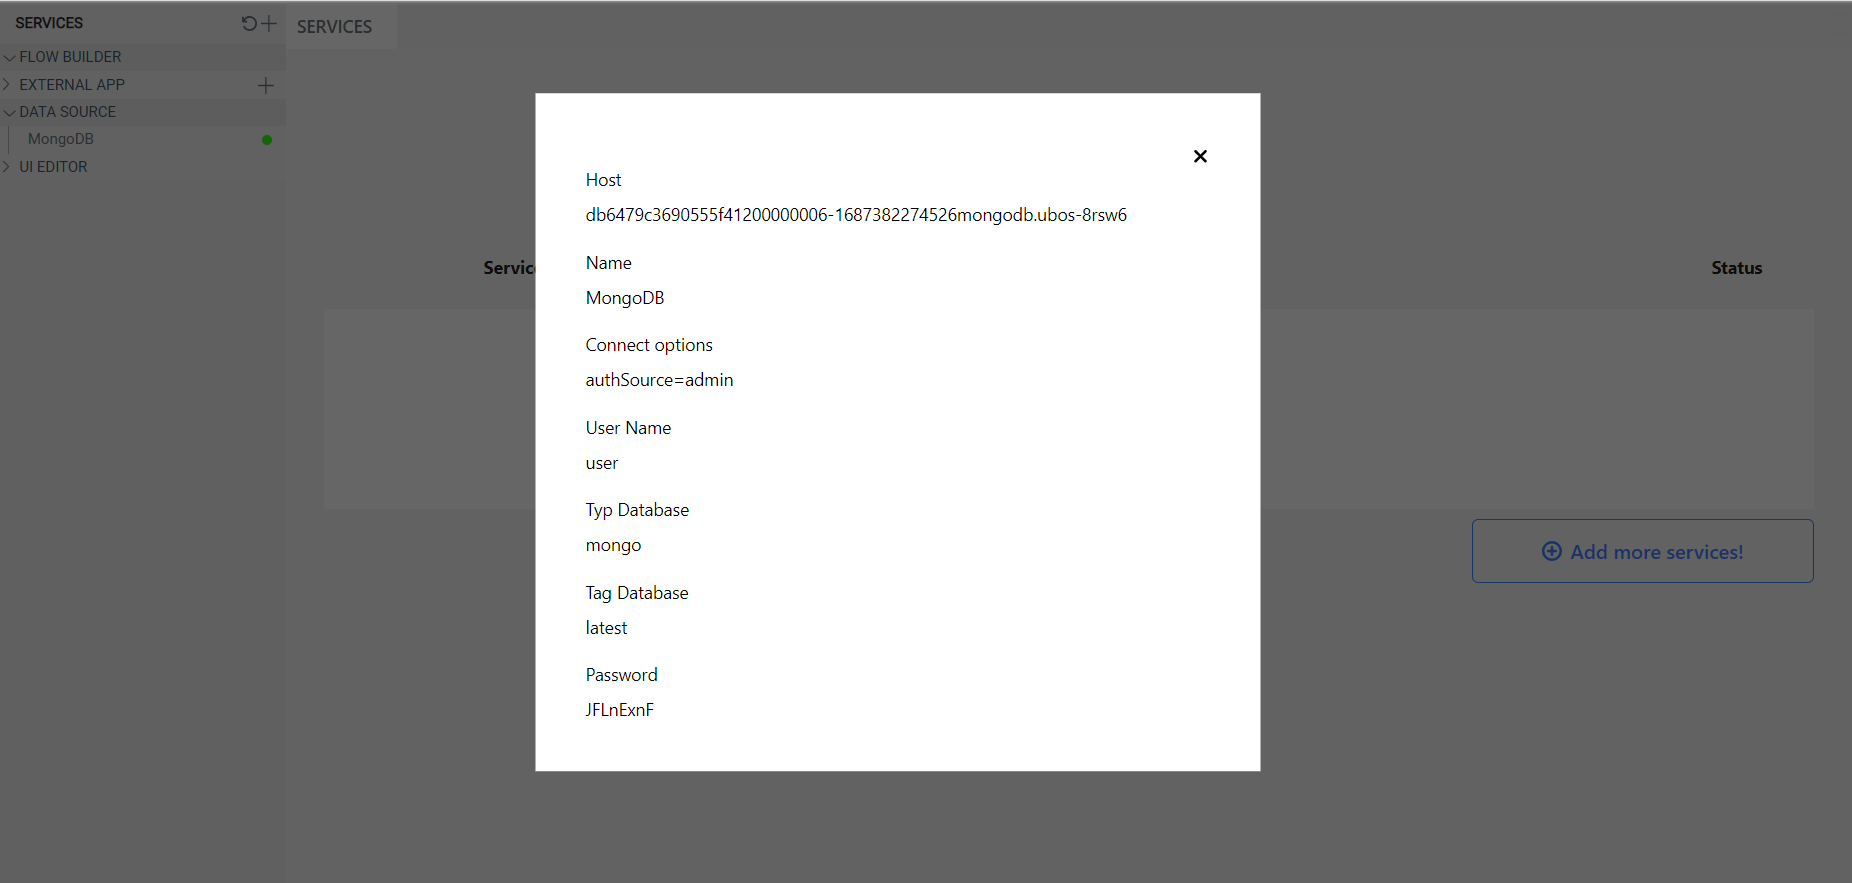
Once a green indicator appears in the left sidebar next to the created database, open the modal window to configure your new database.
Connecting MongoDB to Node-RED
To use the MongoDB database in the Node-RED environment, you need to add nodes for working with MongoDB. Follow these steps:
- Open the Node-RED interface or editor.
- Click on the menu icon (usually represented by three horizontal lines) to expand the menu options.
- Select "Manage Palette" from the menu.
- In the Manage Palette window, click on the "Install" tab.
- Search for "node-red-node-mongodb" in the search bar.
- Once you find the "node-red-node-mongodb" package, click the "Install" button next to it.
- Wait for the installation process to complete.
- After the installation is finished, you can start using the MongoDB nodes in your Node-RED flows.
By installing the "node-red-node-mongodb" package, you will have access to the necessary nodes for working with MongoDB within the Node-RED environment.
After the installation, the downloaded nodes will appear in the list of available nodes.

Next, you need to enter the data of the created database into the node.
- mongodb in - find, cound, aggregate
- mongodb out - save, insert, update, remove
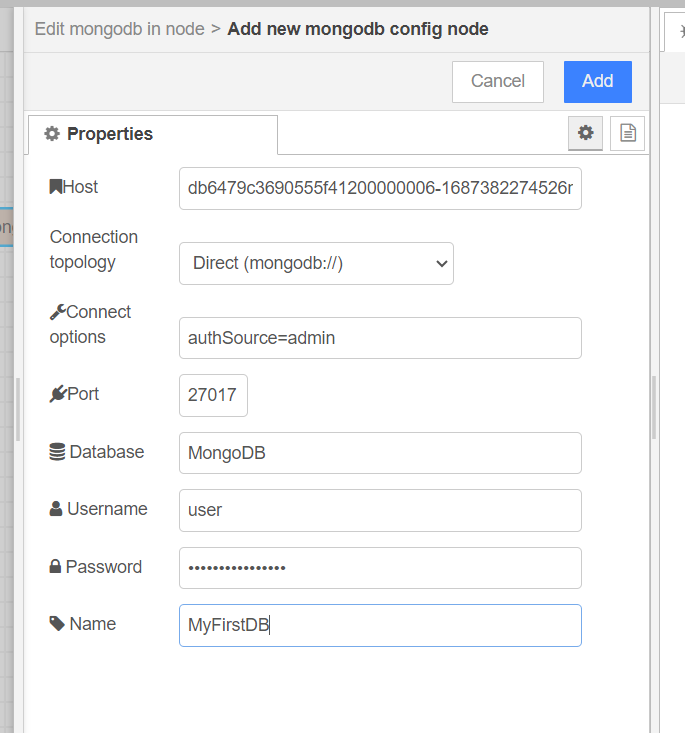
After filling in the data, you need to click on the "Update" button, followed by "Done" and then click on "Deploy". If the data has been entered correctly, the text "connected" will appear below the node, indicating a successful connection.
