Connect a Custom VPS
Unlock the full potential of our platform by seamlessly integrating your own Virtual Private Server (VPS). By connecting your VPS, you gain unparalleled flexibility and control, allowing you to fine-tune your infrastructure to suit specific business objectives or project requirements. Whether you need additional resources or custom configurations, this integration offers a robust solution for scaling your operations.
If you're using AWS or GCP, check out our step-by-step guides:
Prerequisites
To successfully connect your VPS to the platform, ensure that the following conditions are met:
| Requirement | Description |
|---|---|
| Public IP Address | Ensure your server has a public IP address for establishing the connection. |
| SSH Username | The username with administrative privileges for SSH access (typically 'root' or an admin user). |
| Private Key | The private key needed to authenticate the SSH connection. |
| Minimum Server Specs | Your server must have at least 1 CPU core and 2 GB of RAM. |
| Open Port | Port 6443 must be open for external access to enable the connection. |
How to Connect Your VPS
Follow this simple step-by-step guide to connect your VPS to the platform. Each step includes images and easy-to-understand instructions to help you through the process.
Step 1: Open workspce
Open workspace or create new workspace

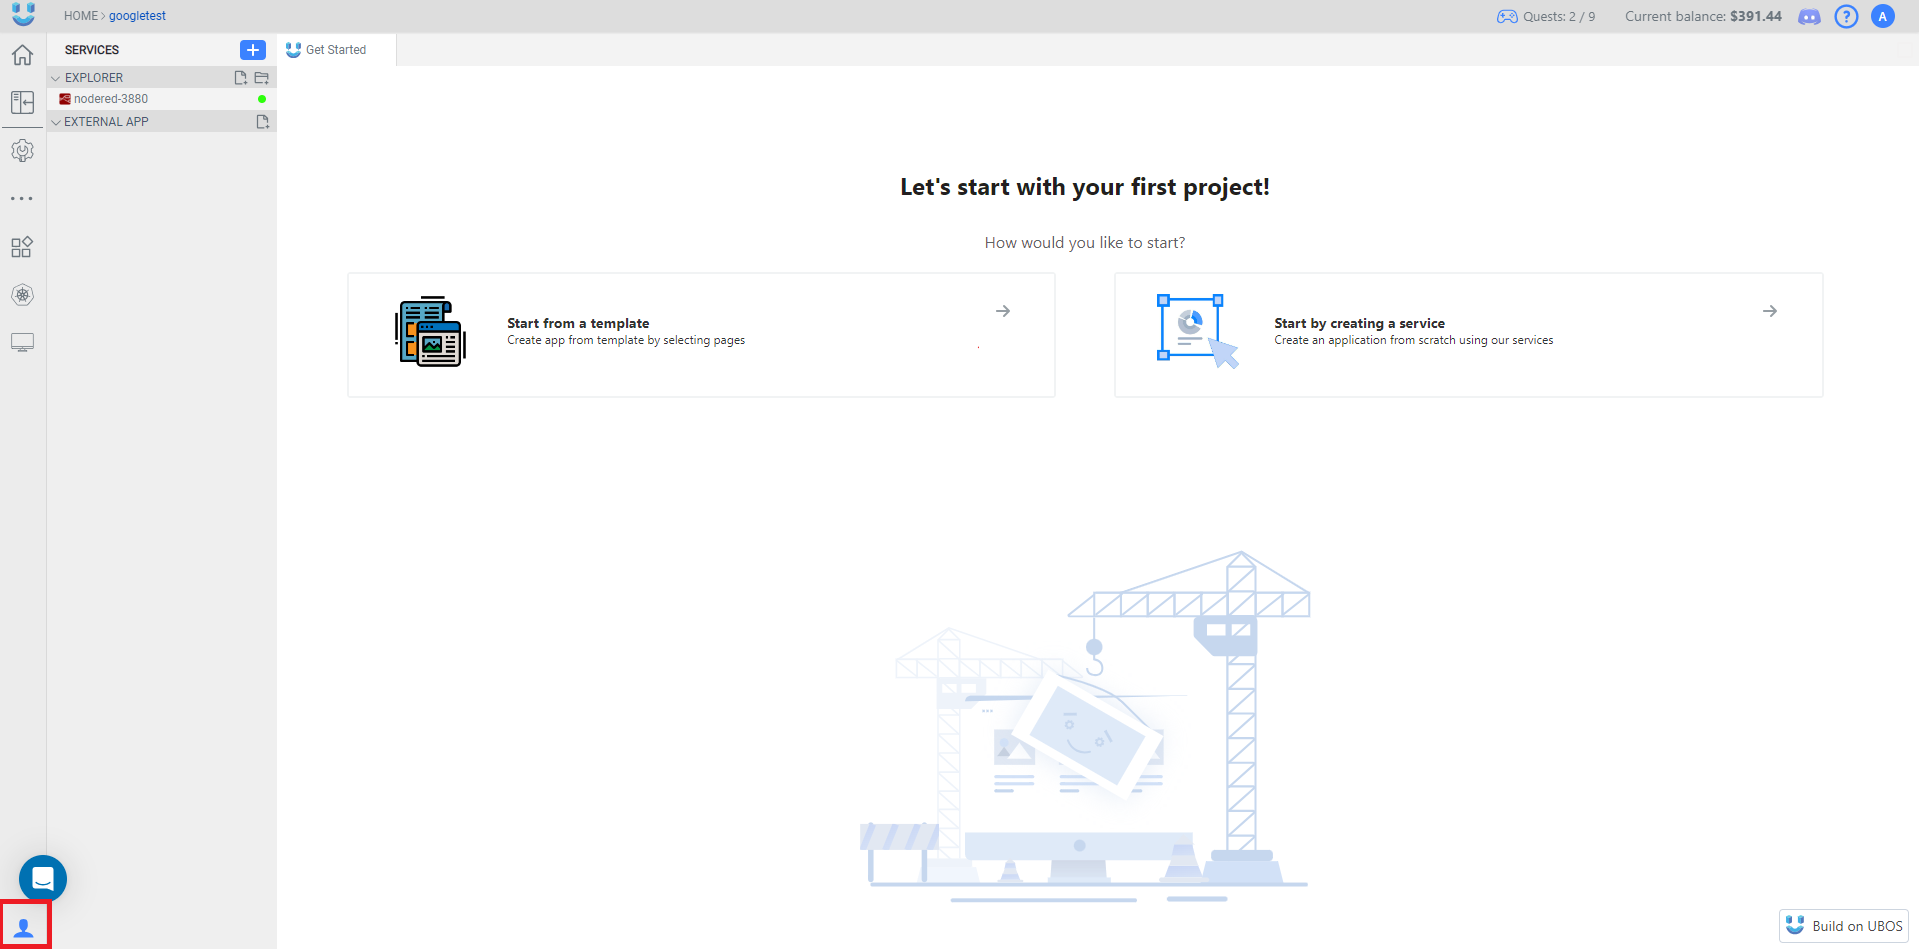
Step 2: Navigate to User Settings
To begin, go to the User Settings tab by clicking on the "User Settings" icon in the lower left corner of the workspace screen.
Step 3: Open "Your Servers" Page
Once you're in the User Settings tab, click on the Your Servers option in the menu.

Step 4: Add a New Server
Now, click the Add New Server button to start connecting your VPS.
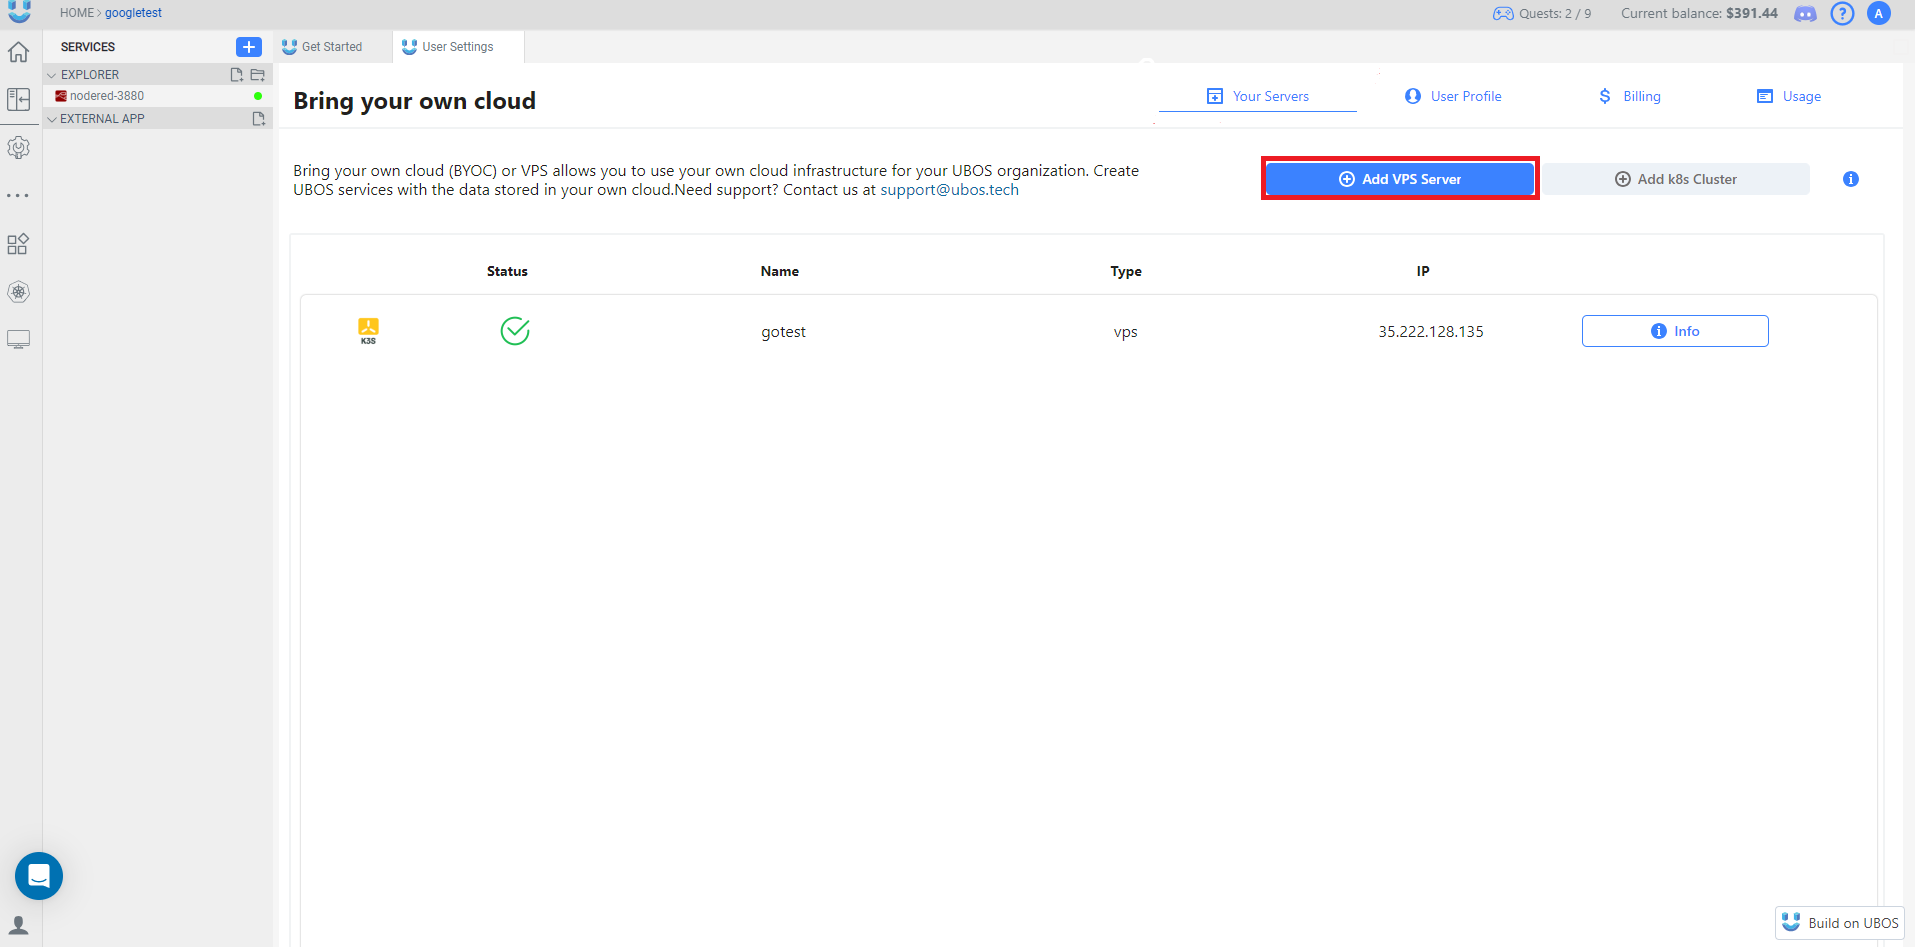
This will open the interface for adding your server details.
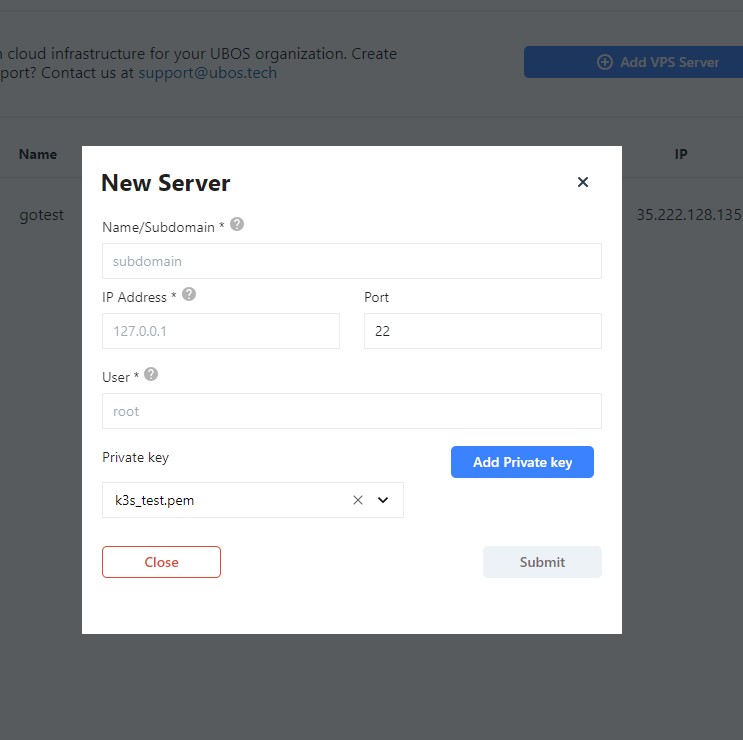
Step 5: Fill in Server Details
In the form, you need to provide the following information:
| Field | Description |
|---|---|
| Name/Subdomain | Enter the server's name or subdomain to help you identify it in the system. |
| IP Address | Input your server’s public IP address so it can be accessed. |
| Port | Specify the SSH port (default is 22, but it can vary depending on your server). |
| User | The username for SSH access (often 'root' for administrative tasks). |
| Private Key | Choose the private key for authentication. You can add a new key if necessary. |
Step 6: Add a Private Key (If Needed)
If you need to add a new private key, click the Add Private Key button. This will bring up the following interface:
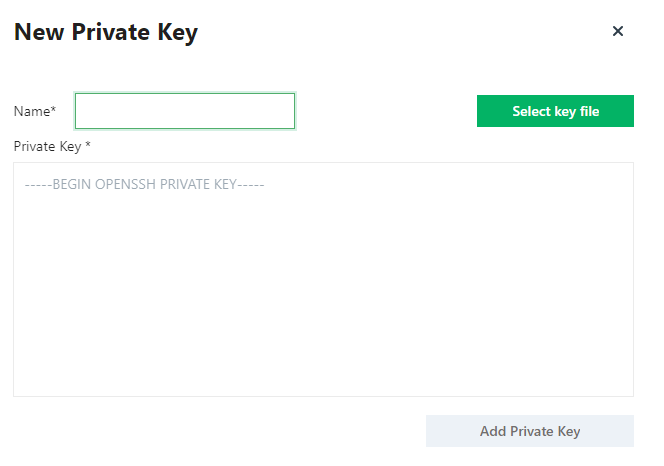
Here’s how to fill out the private key form:
| Field | Description |
|---|---|
| Name | Enter a unique name for the private key to easily identify it in the system. |
| Private Key | Paste the private key here. Make sure it starts with -----BEGIN OPENSSH PRIVATE KEY----- and ends with -----END OPENSSH PRIVATE KEY-----. |
| Select Key File | Alternatively, you can upload the private key file from your computer by clicking this button. |
This form allows you to either paste the key or upload it as a file.
Step 7: View Your Connected Servers
After adding your server, it will be displayed in the Your Servers table.

Step 8: Check Detailed Information
For more detailed information about a specific server, click the Info button next to the server. This will give you a detailed view of that server's settings.
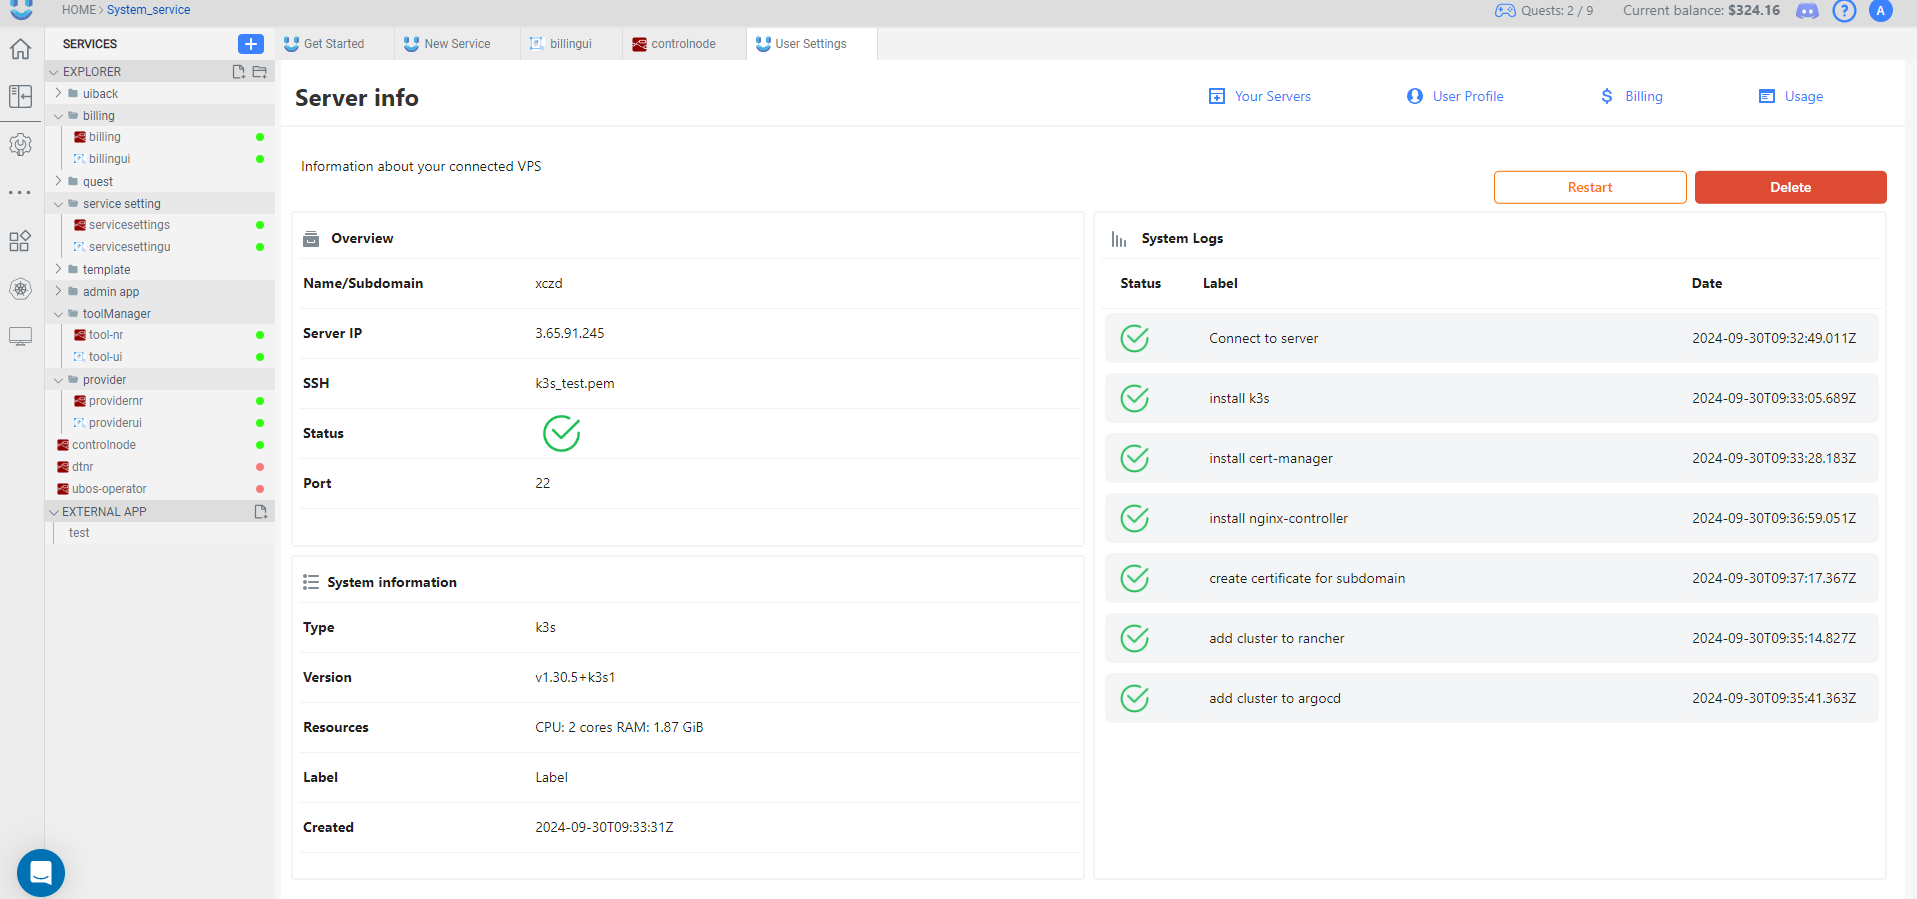
Example of Connecting a VPS to the Platform
Want to see examples of how to connect a VPS on different platforms? Explore our guides for AWS and GCP:
Next Steps: Attach Your Workspace
Once your VPS is connected to the UBOS platform, you can use it to run your services and applications. To learn more about using your connected VPS, visit our Attach Your Workspace guide.