Connected VPS Info
This guide will walk you through how to easily view and manage all the important details of your connected Virtual Private Server (VPS) on the UBOS platform. Whether you're checking resource usage, managing subdomains, or adjusting configurations, this guide covers everything you need to know. Each section includes helpful images to ensure the process is clear and straightforward, so you can stay in control of your infrastructure with confidence.
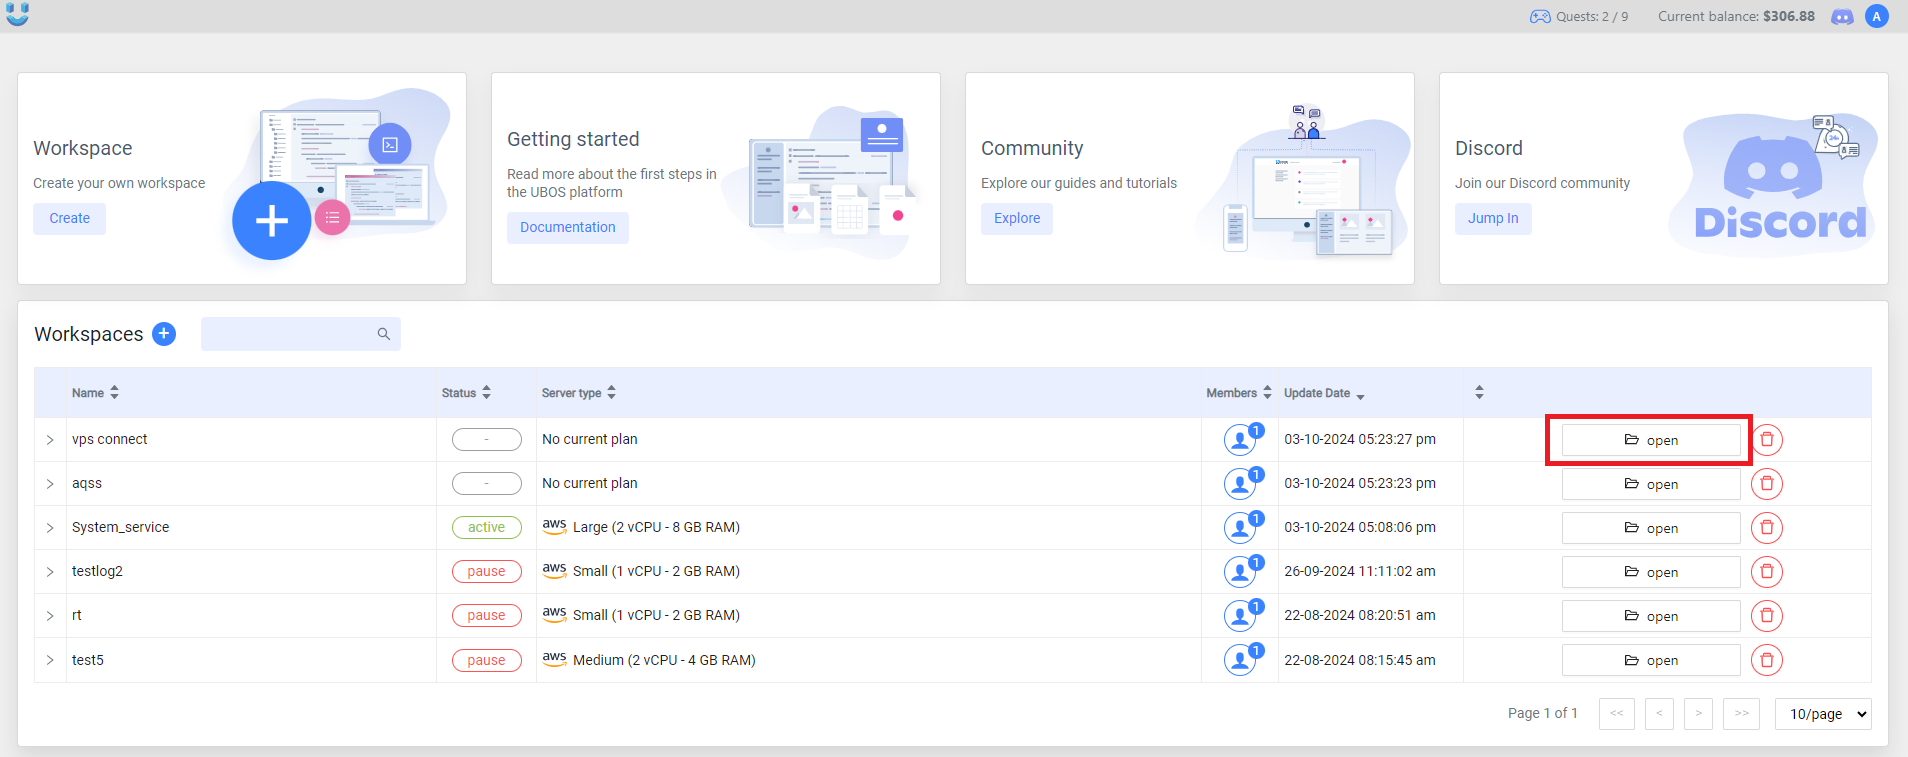
Open Workspace
To begin, either open an existing workspace or create a new one. This workspace will allow you to manage the services associated with your connected VPS.
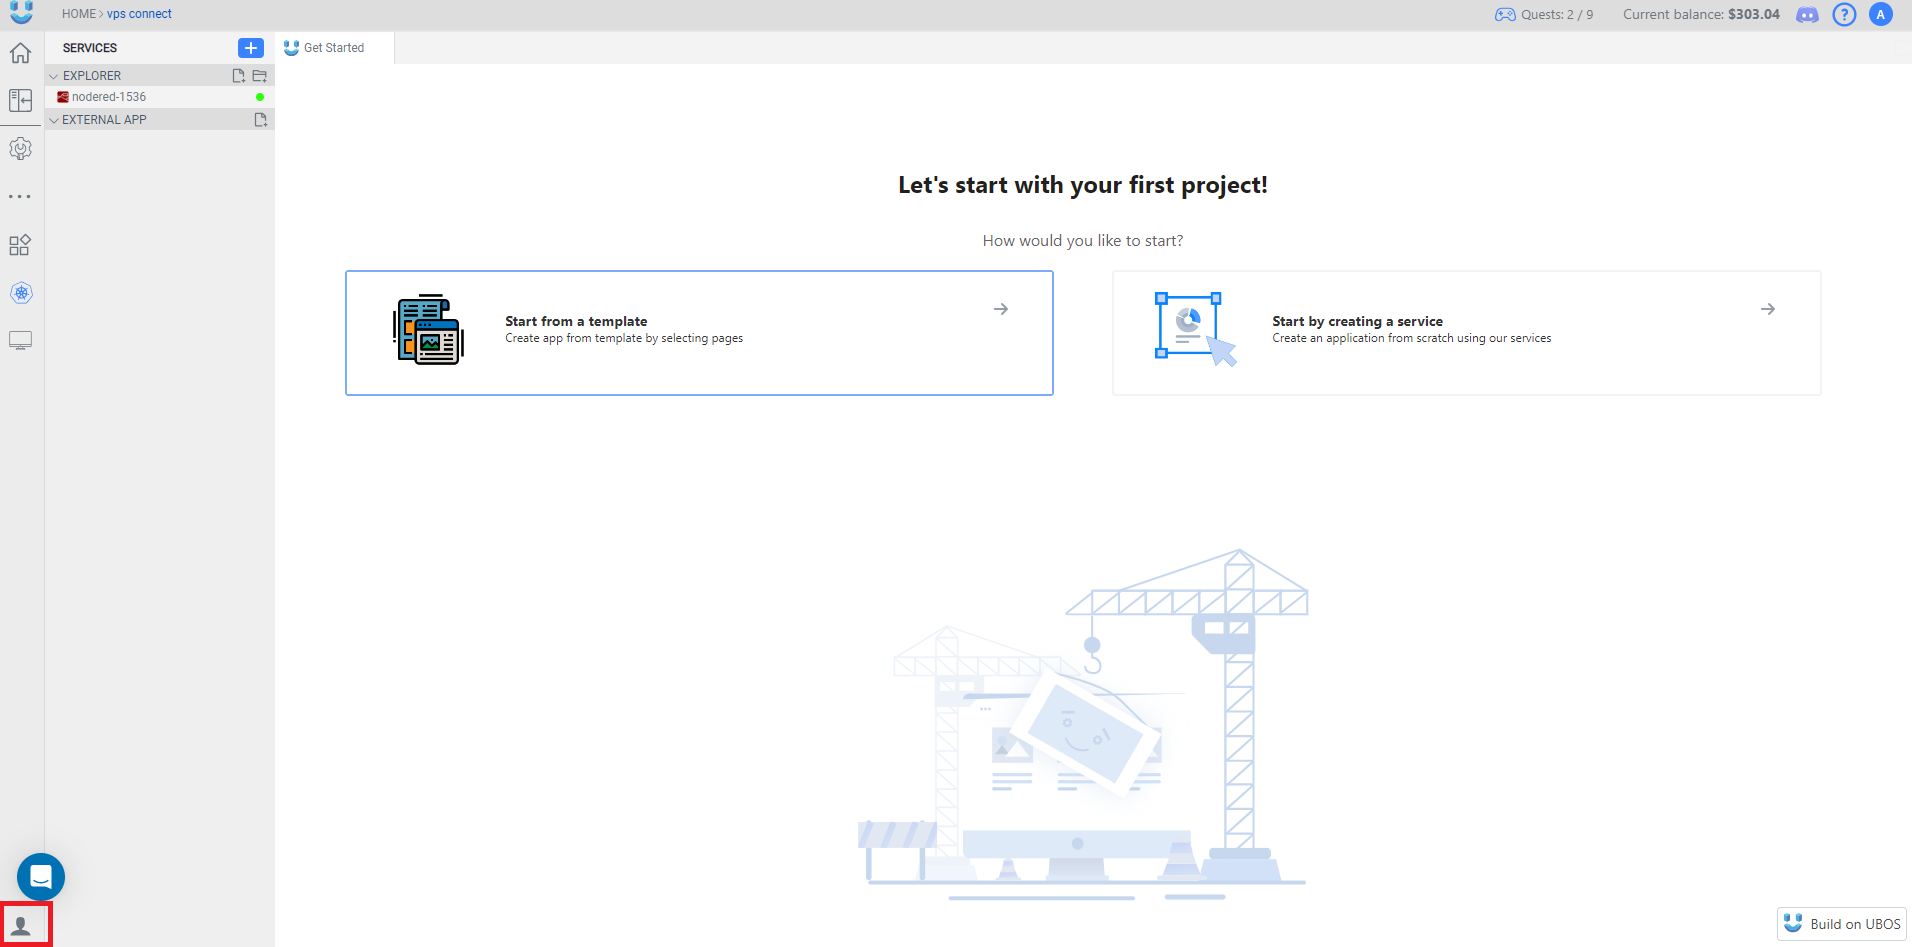
Navigate to User Settings
Once you are in the workspace, go to the User Settings tab by clicking on the "User Settings" icon in the lower-left corner of the workspace screen. This section is where you'll manage the settings for your workspace and connected VPS.
Access the VPS Settings
After entering the User Settings section, navigate to the Your Servers option to view the VPS settings. This page will display all connected VPS instances associated with your account. You can view detailed information about each VPS by clicking the Info button next to the server

Review VPS Details
Once the VPS is connected, this section will display all relevant settings and configurations, including the VPS's IP address, username, and more. Below are the detailed blocks that provide information about your VPS:
General Information
This information allows you to quickly verify the main aspects of your VPS.
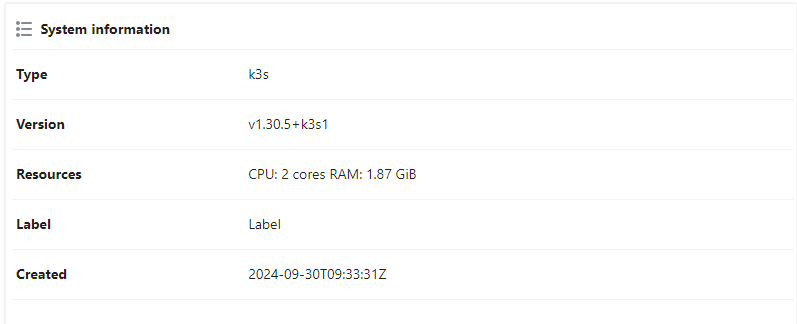
System Information
The System Information section provides an overview of the VPS configuration, including resource allocation and version information.
| Field | Description |
|---|---|
| Type | Displays the type of service running on the VPS (e.g., k3s, a Kubernetes distribution). |
| Version | Indicates the version of the service running on your VPS (e.g., v1.30.5+k3s1). |
| CPU | The number of CPU cores allocated to the VPS (e.g., 2 CPU cores). |
| RAM | The amount of memory allocated to the VPS (e.g., 1.87 GiB). |
| Created | The timestamp of when the system or service was created (e.g., 2024-09-30T09:33:31Z in UTC). |
This table helps you track the resources, type, and version of your VPS, giving you a clear understanding of the system's setup.
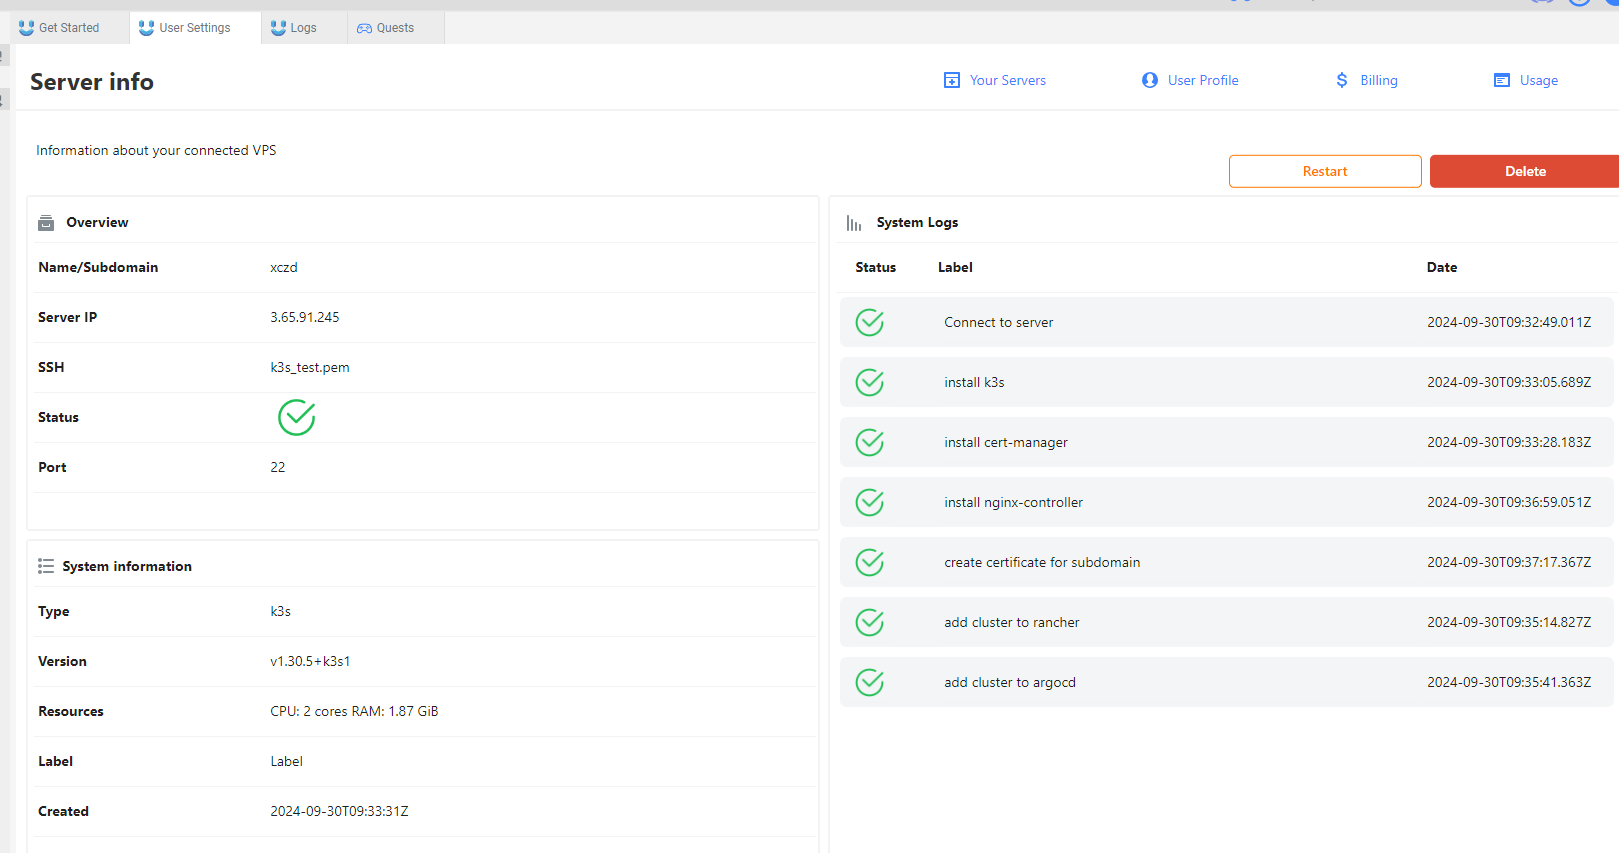
Monitor VPS Status
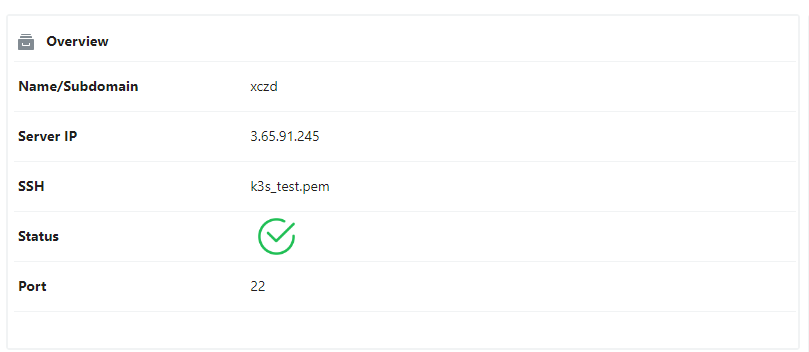
This block allows you to monitor the status of your connected VPS. It displays important details such as the name, IP address, and connection status, as shown below.
| Field | Description |
|---|---|
| Name/Subdomain | The name or subdomain of the connected VPS (e.g., xczd). |
| Server IP | The public IP address of the VPS (e.g., 3.65.91.245). |
| SSH Key | The name of the SSH key file used for secure access (e.g., k3s_test.pem). |
| Status | A green checkmark indicates that the VPS is connected and active. |
| Port | The port number used for SSH access, typically the default port 22. |
This interface ensures that your VPS is functioning properly and is connected to the UBOS platform.
System Logs
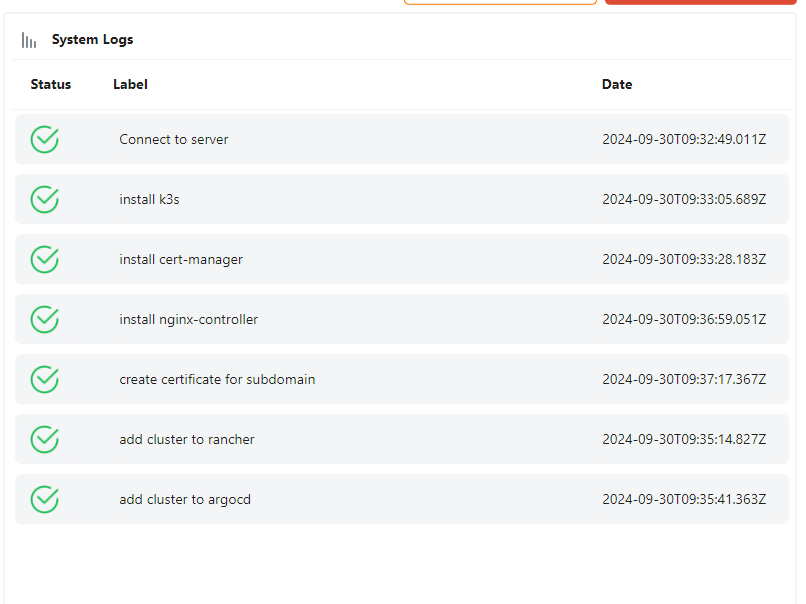
The System Logs section allows you to track recent tasks performed on your connected VPS. Each log entry displays the status of the task, what operation was performed, and the exact time of completion.
| Field | Description |
|---|---|
| Status | A green checkmark indicates that the task was successfully completed. |
| Label | Describes the task or operation performed (e.g., "Install k3s", "Add cluster to ArgoCD"). |
| Date | Shows the exact time of task completion in UTC format (e.g., 2024-09-30T09:33:31Z). |
System logs give you a complete view of actions taken on your VPS, ensuring that important tasks have been performed correctly.
Restart or Delete VPS
In this section, you have the option to Restart or Delete your VPS from the UBOS platform. If you choose to delete the VPS, it will only be removed from the UBOS platform, but the server itself will continue to run on your infrastructure.
- Restart VPS: Clicking this button will refresh the VPS connection to the UBOS platform. This can be useful if you encounter any connection issues. The VPS will remain functional on your infrastructure during this process.
- Delete VPS: Clicking this button will remove the VPS from the UBOS platform, but it will not stop the server itself. The VPS will continue running on your infrastructure but will no longer be linked to the UBOS platform.
If clicking these buttons brings up additional modals for confirmation, those should be displayed to the user to confirm their actions.
