How to Create and Connect a VPS on GCP to UBOS
This guide will walk you through the process of connecting your Google Cloud Platform (GCP) Virtual Private Server (VPS) to the UBOS platform. Follow the simple steps below, each with images and clear instructions.
Prerequisites for Connecting Your GCP VPS
Make sure the following requirements are met before starting:
| Requirement | Details |
|---|---|
| Public IP Address | Ensure your VM has a public IP address for establishing the connection. |
| SSH Username | The username with administrative privileges for SSH access (typically 'root' or admin user). |
| Private Key | The private key used for authenticating the SSH connection. |
| Minimum Server Specs | Your VM must have at least 1 CPU and 2 GB of RAM. |
| Open Port | Ensure that port 6443 is open for external access, as it is required for the connection. |
Create Firewall Policies on GCP
Before creating your VM, you need to configure the firewall to allow the necessary traffic.
Step 1: Access the Google Cloud Console
Go to the Google Cloud Console.
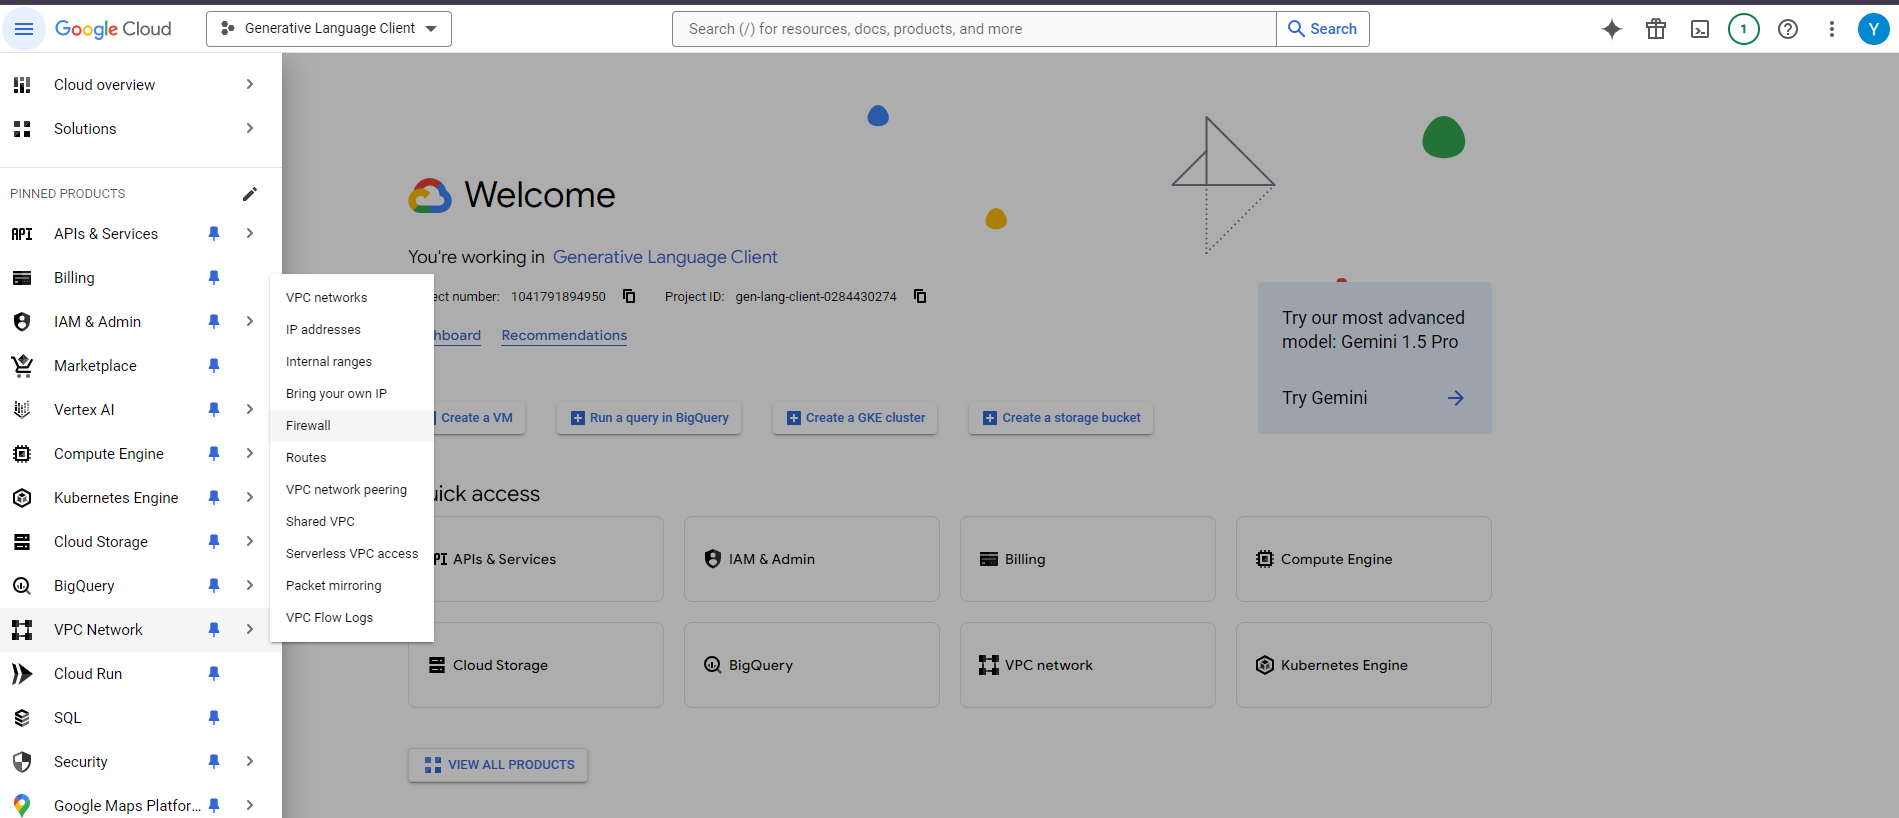
Step 2: Navigate to Firewall Rules
In the left menu, select VPC Network > Firewall.
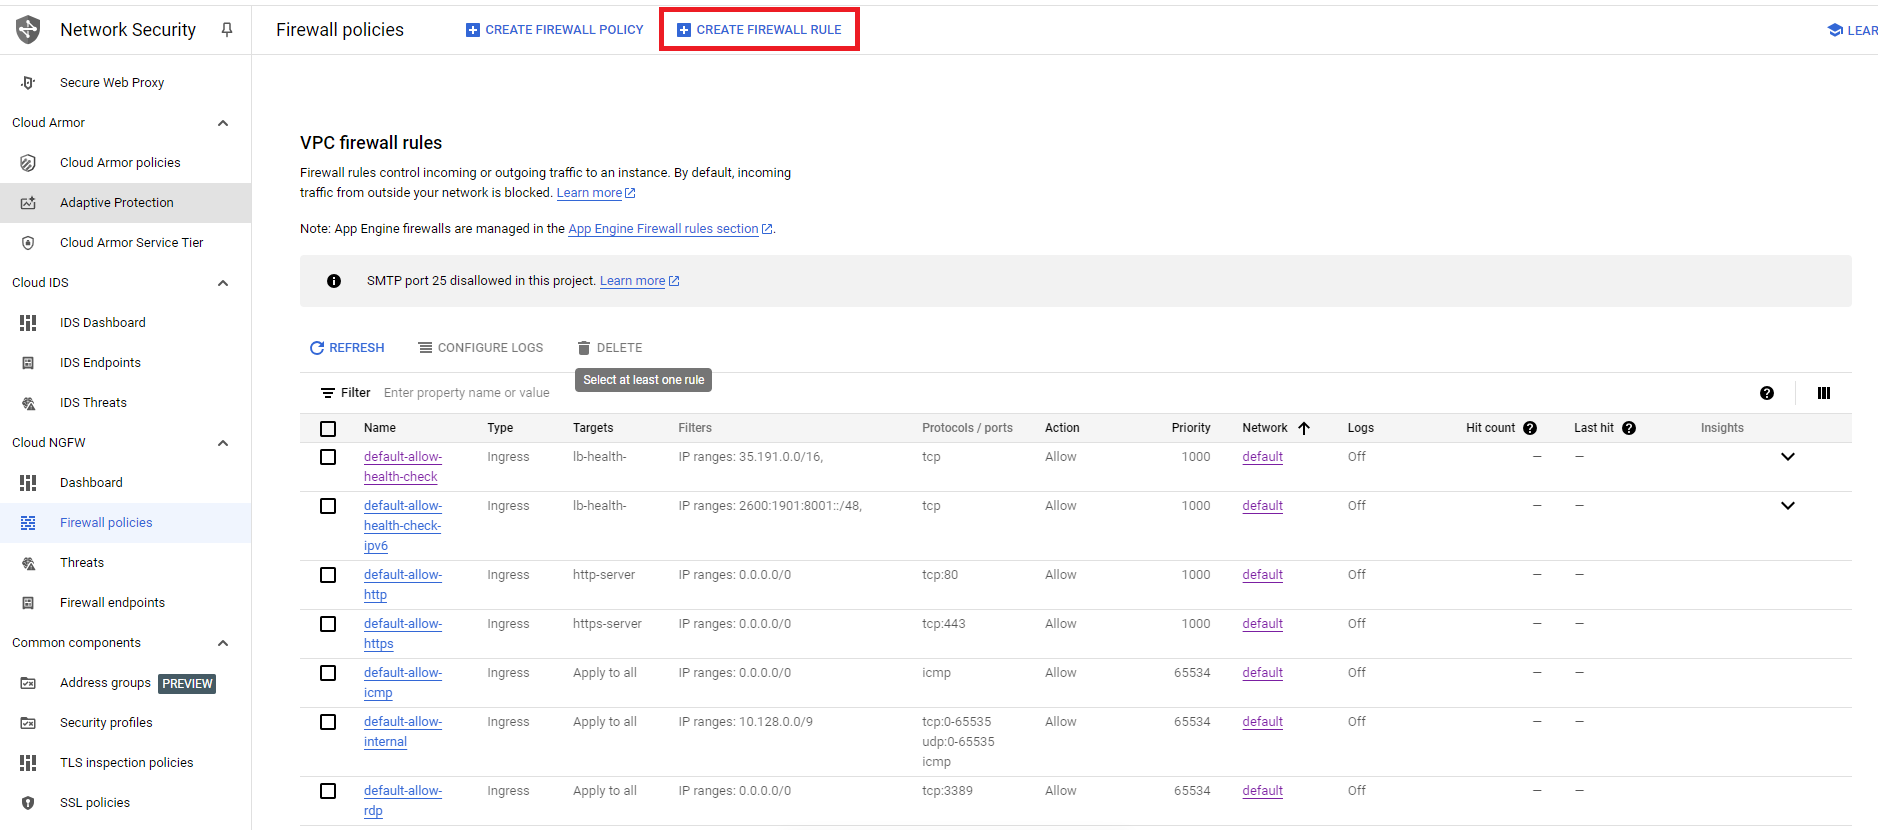
Step 3: Create a New Firewall Rule
Click on the Create Firewall Rule button.
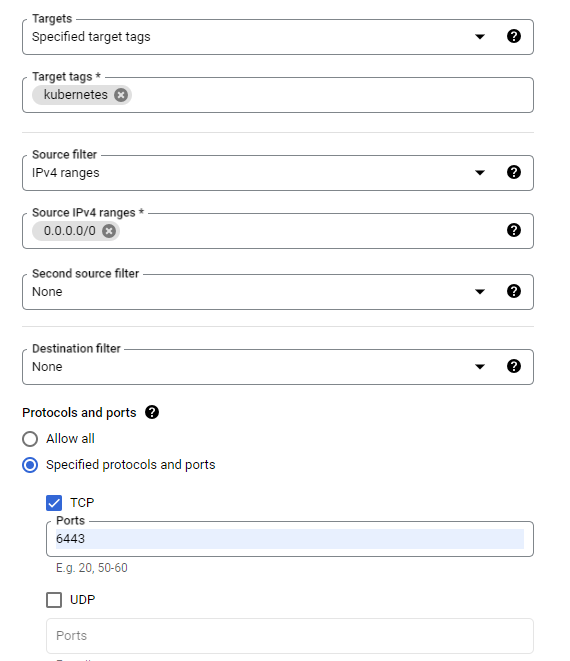
Step 4: Configure the Firewall Rule
- Name: Set a rule name (e.g., "kubernetes").
- Target Tags: Set target tags (e.g., "kubernetes").
- Source: Set the source to 0.0.0.0/0 (for external access).
- Protocols and Ports: Either allow all protocols or specify TCP with port 6443.
Step 5: View the Created Rule
Once created, you will see your new firewall rule listed under the firewall policies.
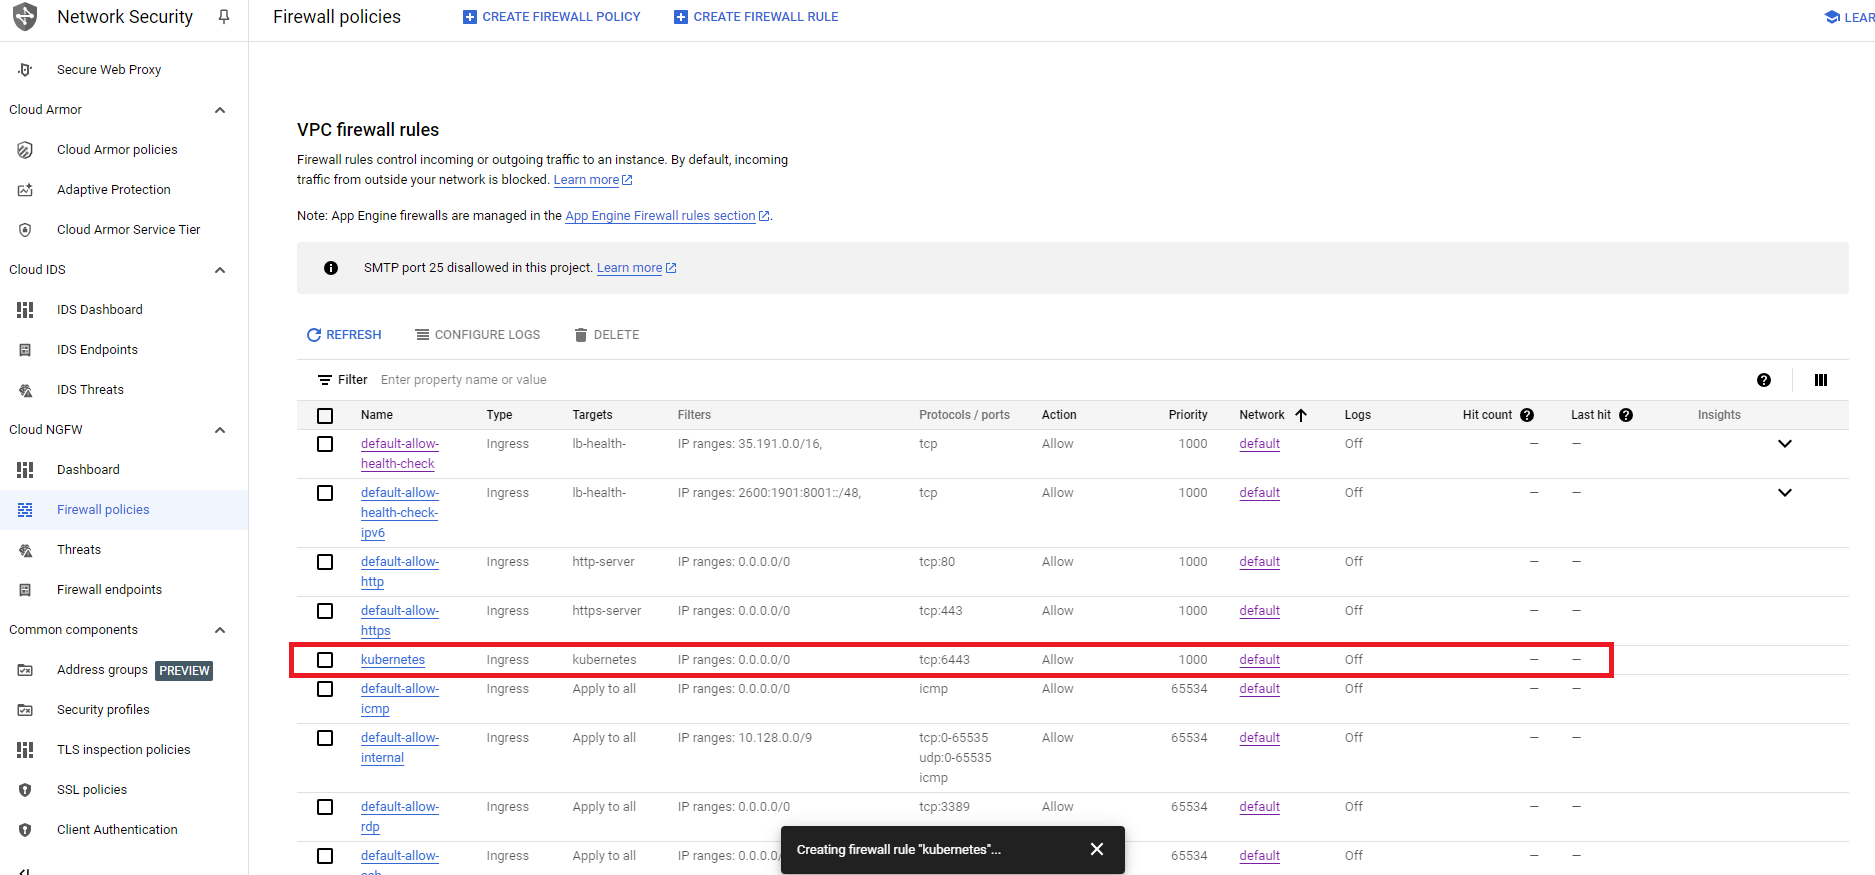
Now, you can proceed to create your VM in GCP.
Create a VPS in GCP
Step 1: Access the Google Cloud Console
Go to the Google Cloud Console.
Step 2: Create a New VM
Click on the Create a VM button.
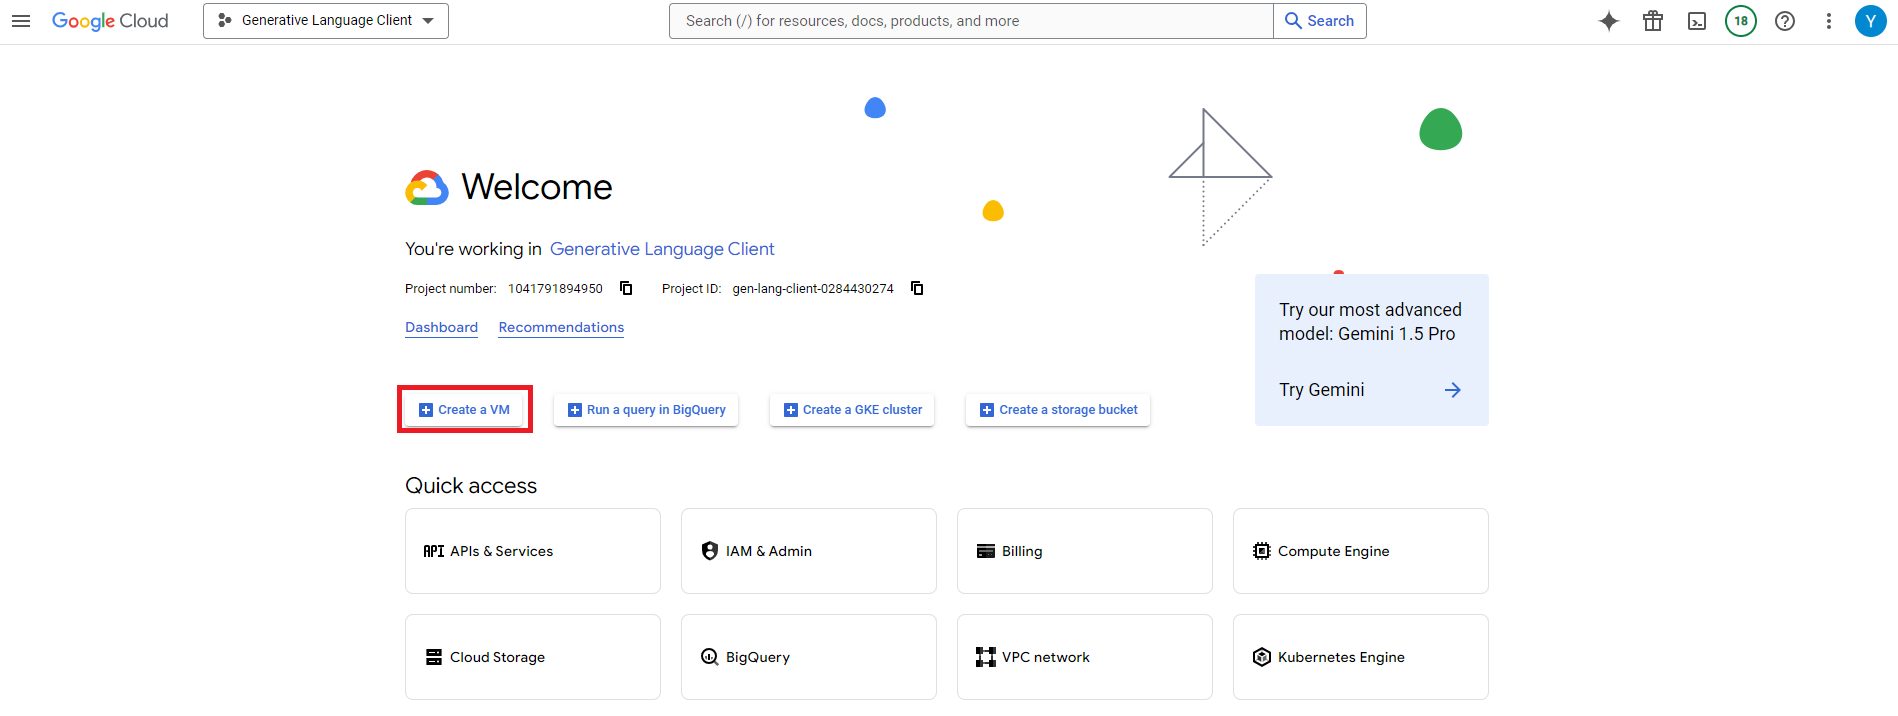
Step 3: Configure the VM
Set the following configurations:
| Field | Details |
|---|---|
| Region and Zone | Choose your preferred region and zone for your VM. |
| Machine Type | Select a machine with at least 1 CPU and 2 GB of RAM. |
| OS and Storage | Set the operating system to Ubuntu and the storage to at least 30 GB. |
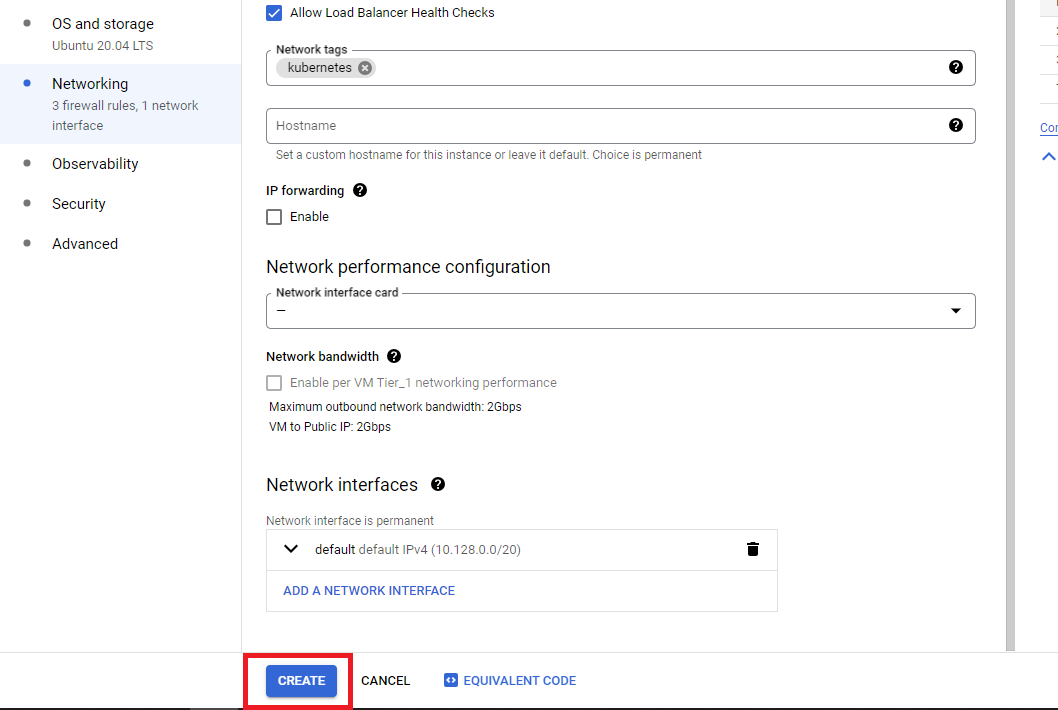
| Network Tags | Add the network tag you created earlier (e.g., "kubernetes"). |
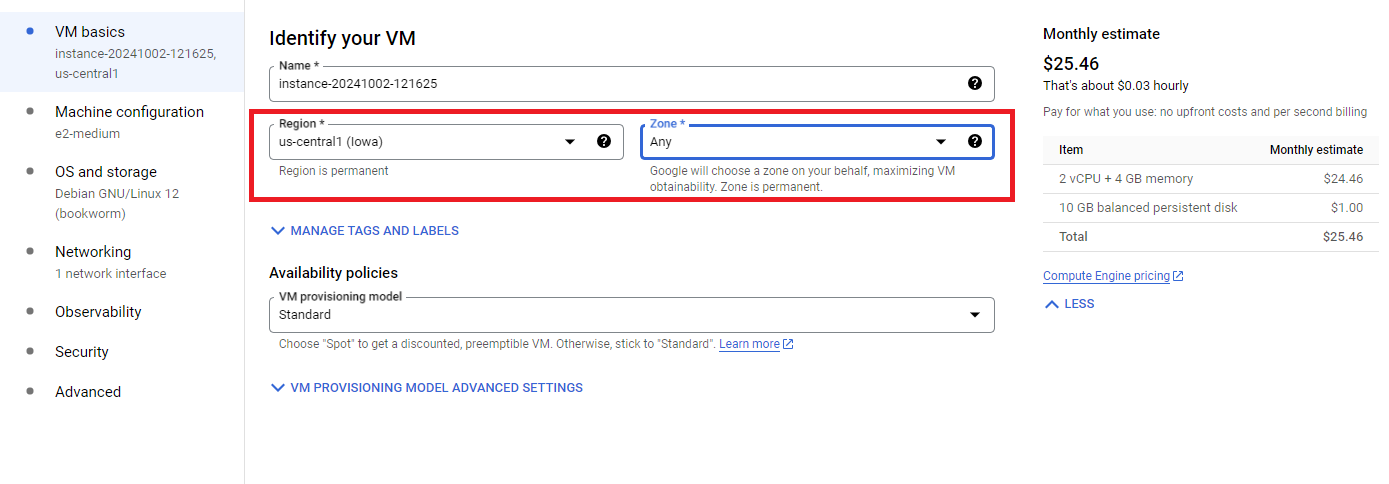
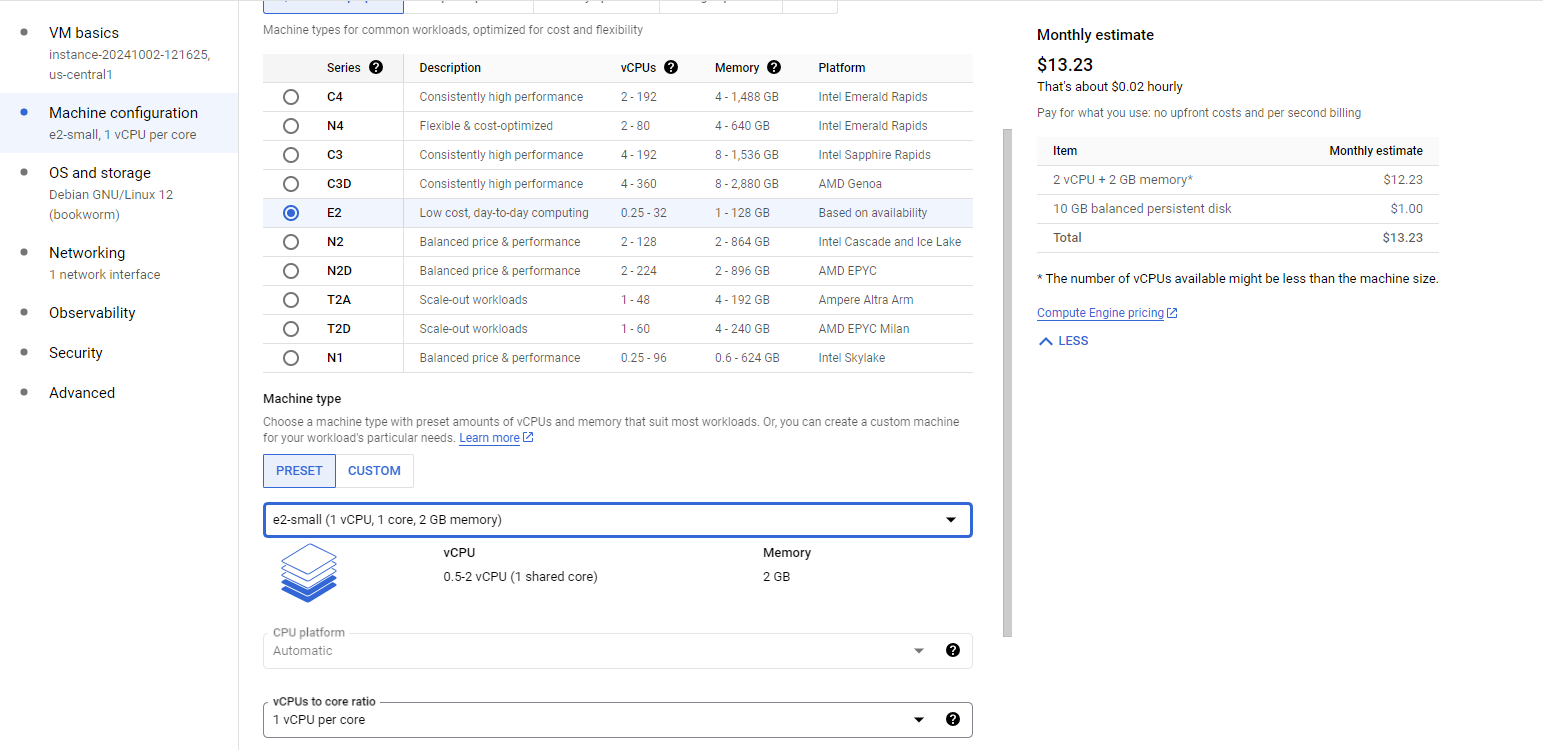
Step 4: Create the VM
Once you've configured everything, click Create to launch the VM.
Step 5: Generate Your SSH Key
If you don’t already have an SSH key, you can create one using the following command:
ssh-keygen -t rsa -f ~/.ssh/KEY_FILENAME -C USERNAME
After generating the SSH key, use the following command to display the public key:
cat ~/.ssh/KEY_FILENAME.pub

This will output the public key to your terminal. Highlight and copy the content of the public key (it should start with ssh-rsa or ssh-ed25519).
Step 6: Add an SSH Key
To access the VM securely, you need to add your SSH key.
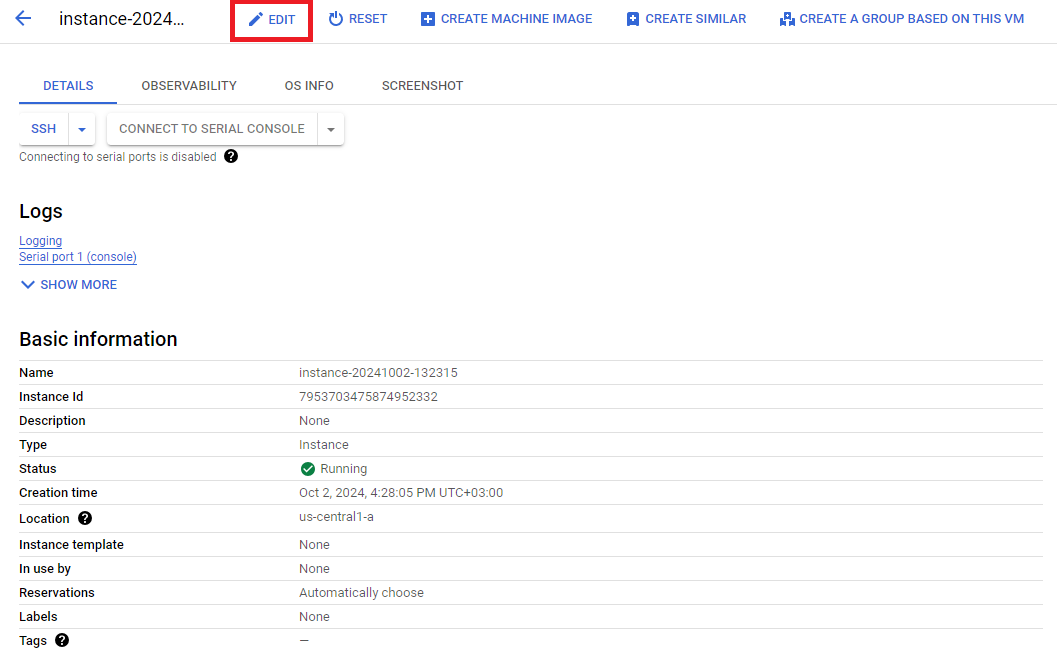
Open the instance details by clicking on the VM in the GCP dashboard.

Click Edit to add your SSH key.
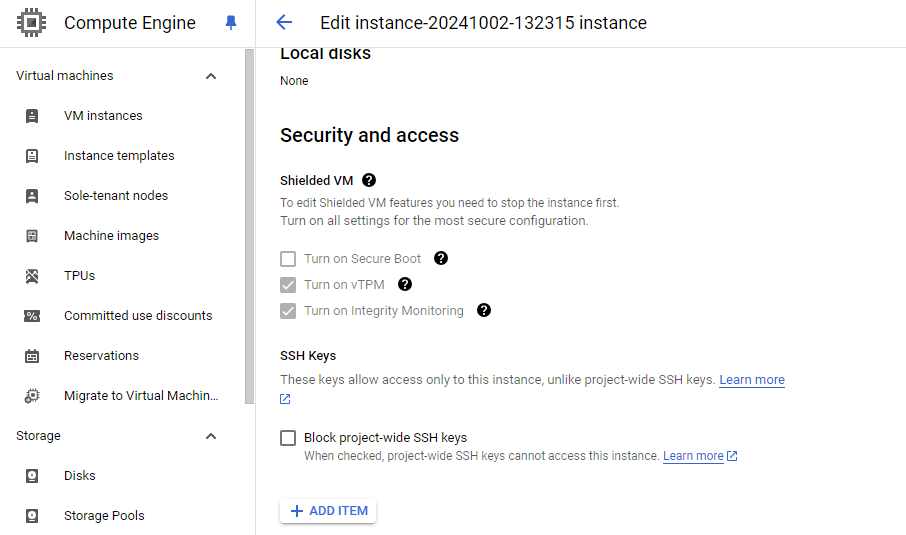
Scroll to the Security and Access section and click Add Item to add the SSH key.
Connect Your GCP VM to UBOS
Now that your GCP VM is configured and the SSH key is added, follow these final steps to connect it to the UBOS platform.
Step 1: Gather Connection Details
To connect your GCP VM to UBOS, you will need the following information:
Public IP Address: The external IP address of your VM, which you can find on the instances page. Refer back to Step 4: Create the VM to locate this information.

SSH Username: This is the username you used when generating the SSH key. You can review how this was set in Step 5: Generate Your SSH Key.
- SSH Private Key[]
Step 2: Input the Information in UBOS
Navigate to User Settings:
To begin, go to the User Settings tab by clicking on the "User Settings" icon in the lower left corner of the workspace screen.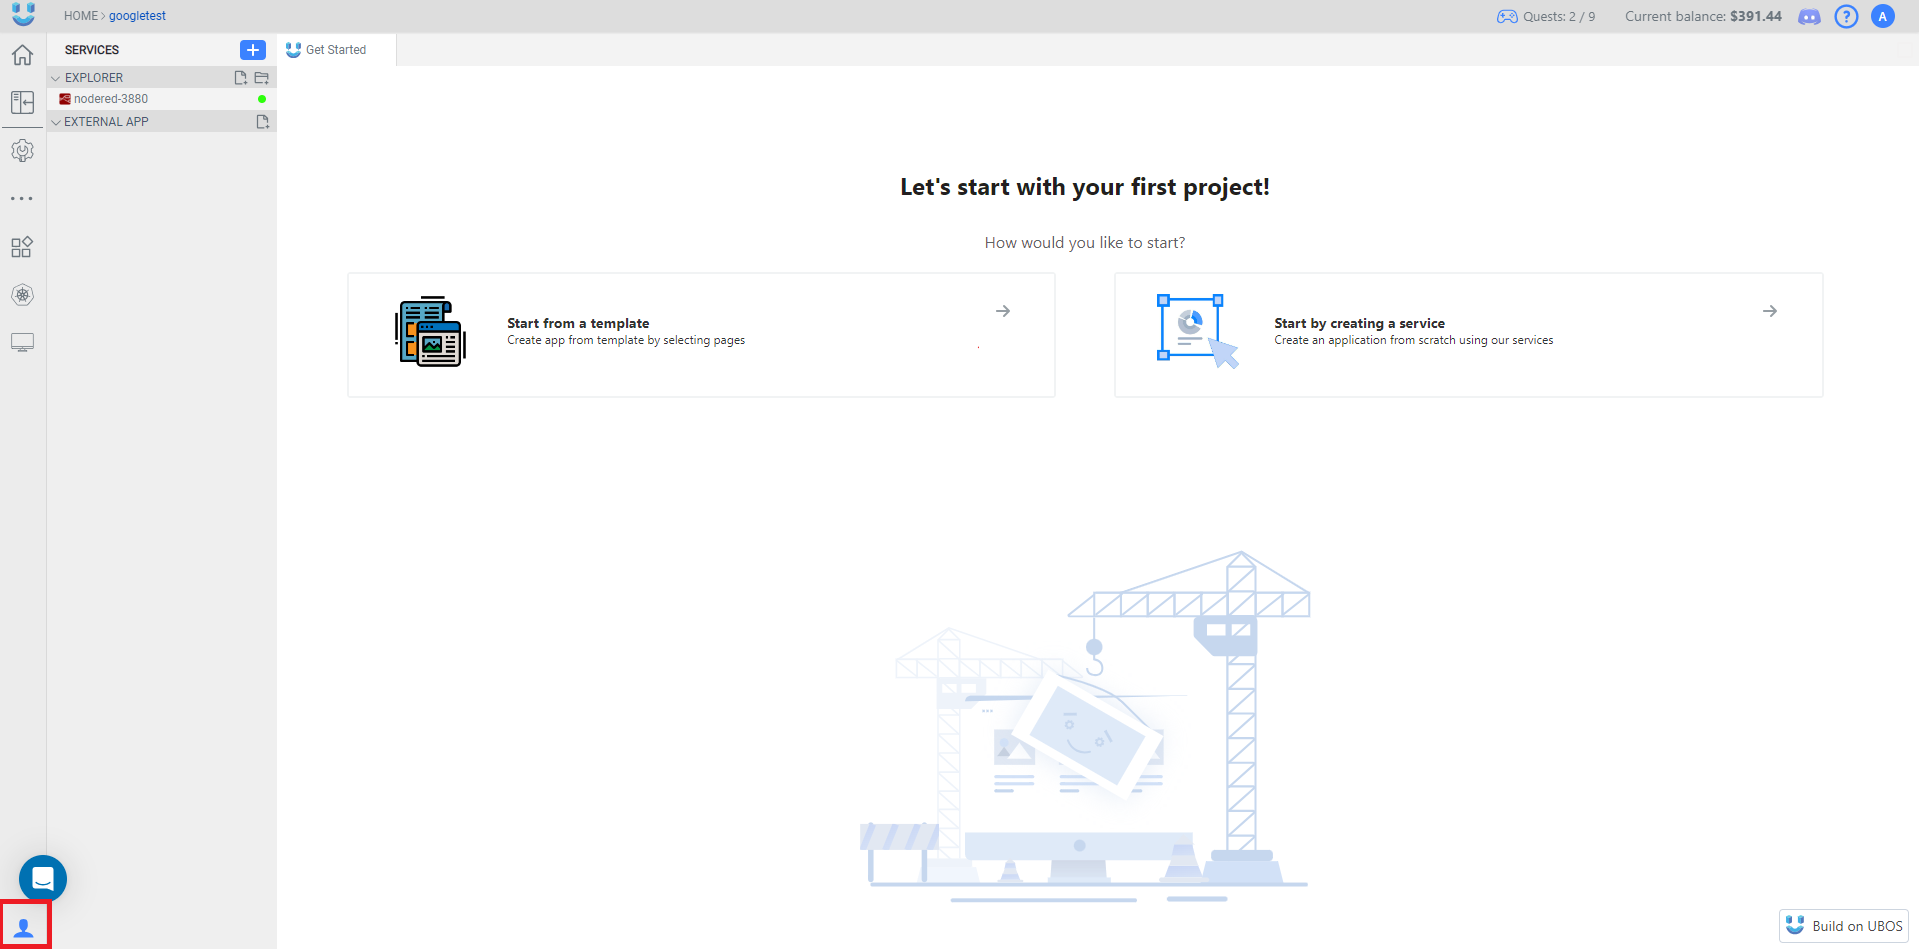
Open "Your Servers" Page:
Once you're in the User Settings tab, click on the Your Servers option in the menu.
Add a New Server:
Now, click the Add New Server button to start connecting your VPS.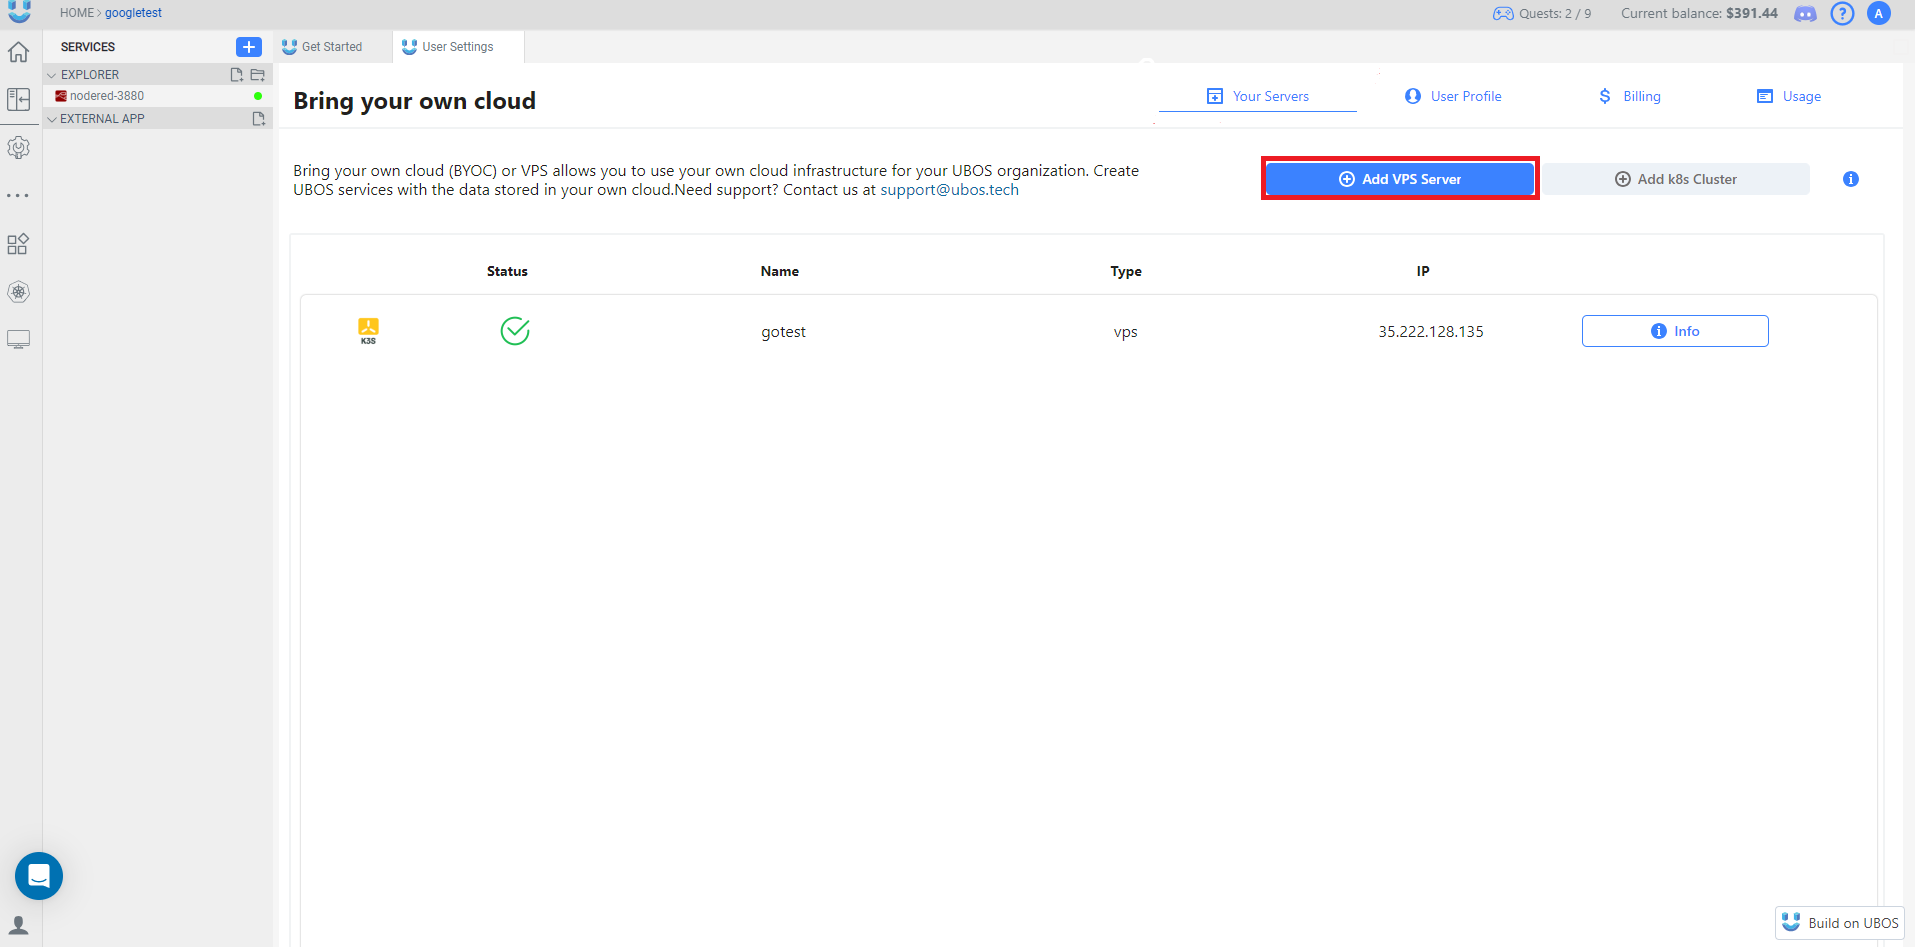
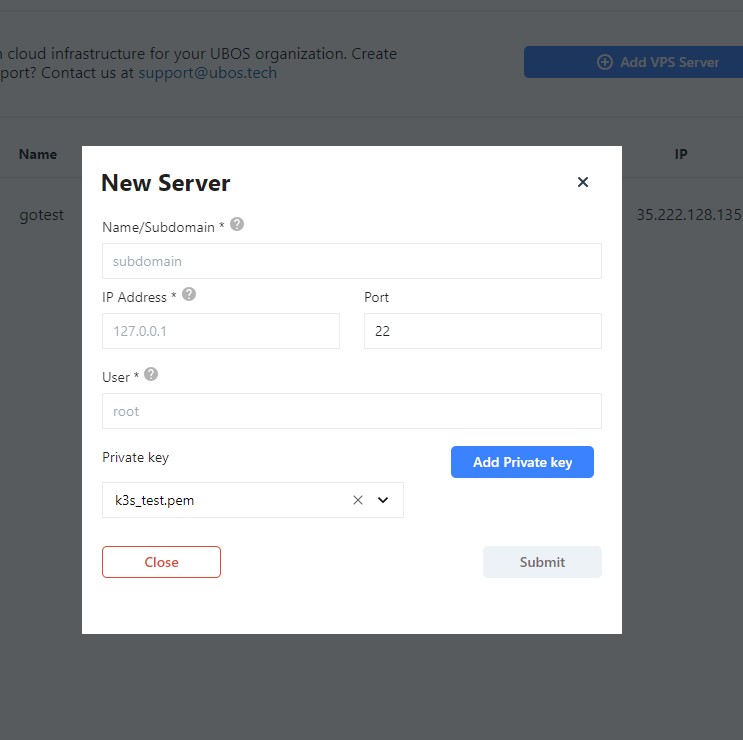
Input the Server Details:
This will open the interface for adding your server details. Fill in the following fields:Field Description Name/Subdomain Choose a name or subdomain to identify your server within UBOS. IP Address Enter the public IP address of your AWS VPS. Port Use the default SSH port (22) unless you’ve configured a different one. User Input the SSH username you retrieved from the Connect tab. Private Key Select or add the SSH private key used for authentication.
- Add Your Private Key:
To add your private key to UBOS, first retrieve the private key file you created earlier by using the following command:
cat ~/.ssh/KEY_FILENAME
This will display the content of your private key. Copy the entire content, making sure it starts with -----BEGIN OPENSSH PRIVATE KEY----- and ends with -----END OPENSSH PRIVATE KEY-----.
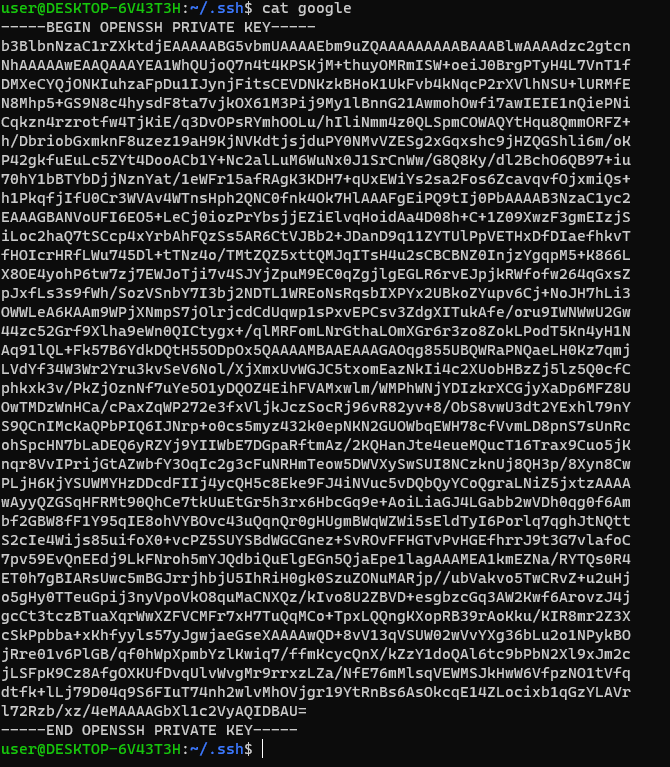
Next, click button Add Private key in the New Server modal, you will see the following fields:
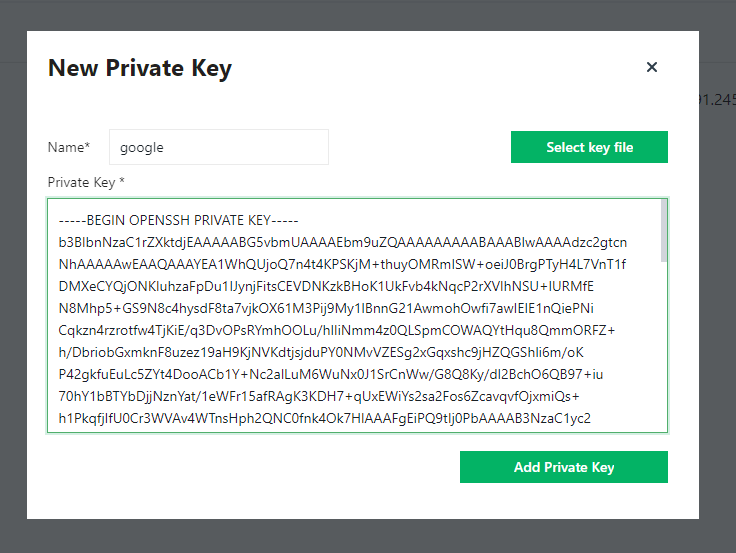
Fill out the form as follows:
| Field | Description |
|---|---|
| Name | Provide a unique name for the private key to easily identify it in the system. |
| Private Key | Paste the private key you copied. Ensure that it includes both the BEGIN and END lines of the key. |
| Select Key File | Alternatively, you can upload the private key file directly from your computer by clicking this button. |
This interface allows you to either paste the private key manually or upload it from a file, giving you flexibility depending on how you stored your key.
Step 3: Finalize the Connection
After filling in all the required fields, click Submit to finalize the connection.
Your GCP VM is now successfully connected to the UBOS platform, allowing you to manage and run your services and applications. To check the status of your connected GCP VM, visit the Your Servers page under User Settings, where you will find a table displaying all connected VPS instances along with their current status.

For more details on how to use your connected VPS, visit our Attach Your Workspace guide.
If you encounter any issues or need further assistance, don't hesitate to revisit the steps on this page or contact our support team for help.