How to Create and Connect a VPS on AWS to UBOS
This guide will walk you through the process of connecting your AWS Virtual Private Server (VPS) to the UBOS platform. Follow the simple steps below, each with images and clear instructions.
Prerequisites for Connecting Your AWS VPS
Make sure the following requirements are met before starting:
| Requirement | Details |
|---|---|
| Public IP Address | Ensure your VM has a public IP address for establishing the connection. |
| SSH Username | The username with administrative privileges for SSH access (typically 'root' or admin user). |
| Private Key | The private key used for authenticating the SSH connection. |
| Minimum Server Specs | Your VM must have at least 1 CPU and 2 GB of RAM. |
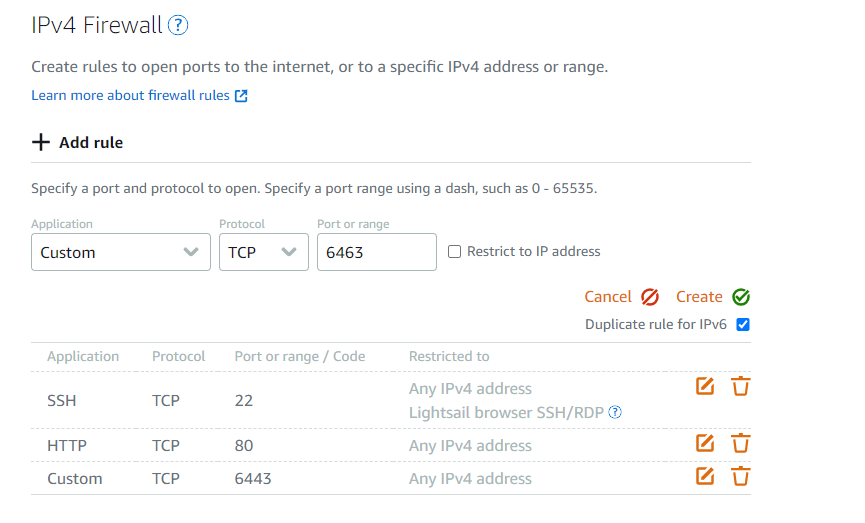
| Open Port | Ensure that port 6443 is open for external access, as it is required for the connection. |
Create a VPS in AWS
Step 1: Open Amazon Lightsail Console
To begin, go to the Amazon Lightsail console.

Step 2: Create a New Instance
Click the Create Instance button to start setting up your VPS.
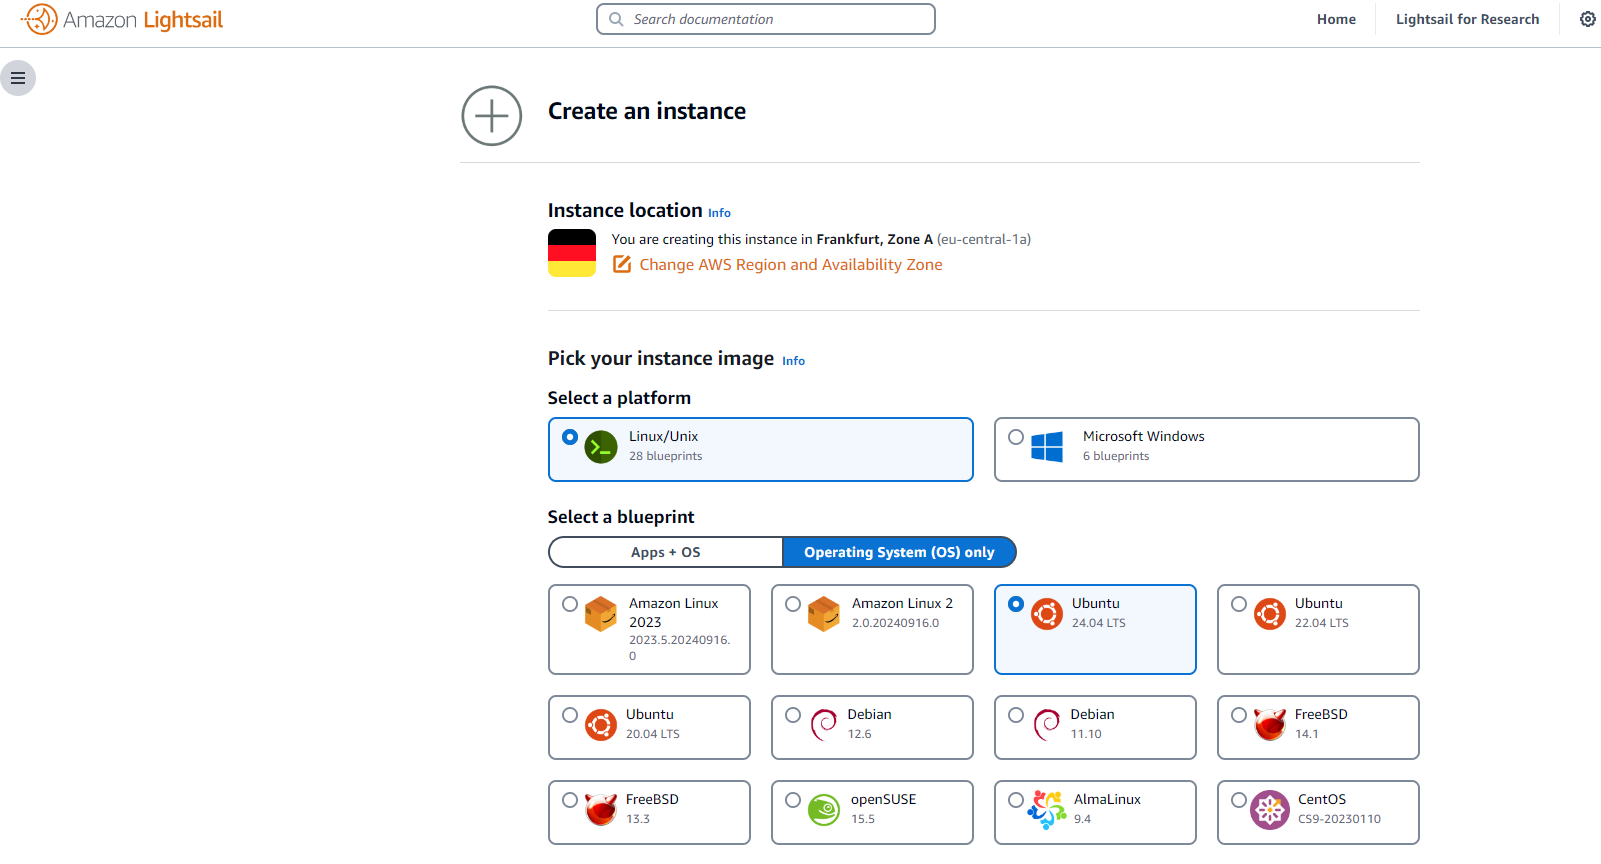
Step 3: Choose Instance Location and Platform
Select the location (region) for your instance and choose the Linux/Unix platform.
Step 4: Select a Blueprint
Pick the appropriate blueprint for your instance, such as Ubuntu 20.04, 22.04, or 24.04.
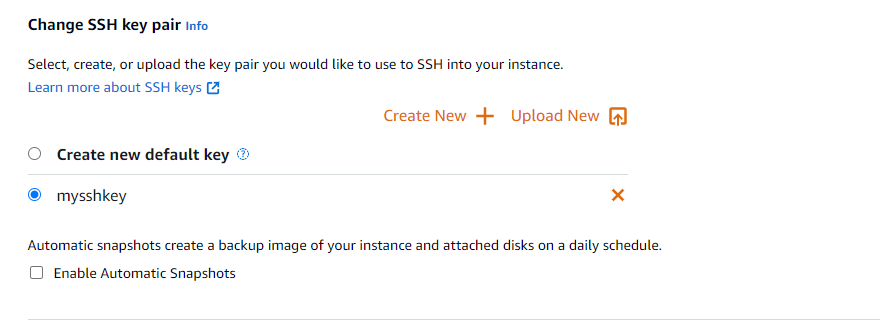
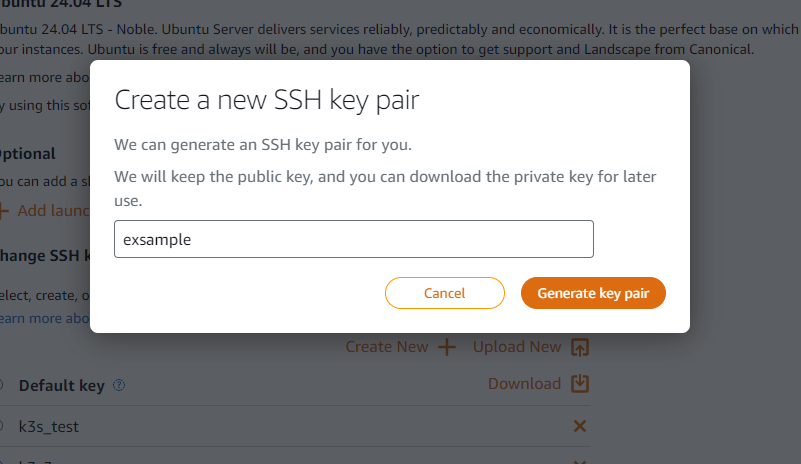
Step 5: Add or Generate an SSH Key Pair
To securely access your instance, add your existing SSH key pair or generate a new one.
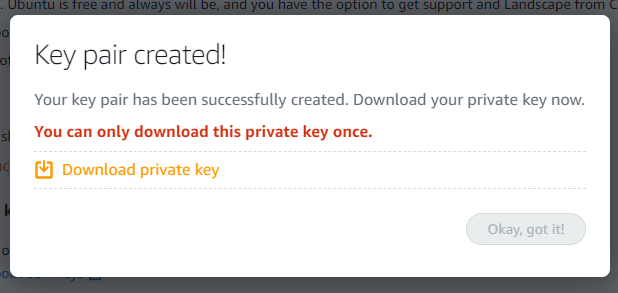
Step 6: Download the SSH Key (If Created)
If you generated a new SSH key, make sure to download it to your computer for later use.
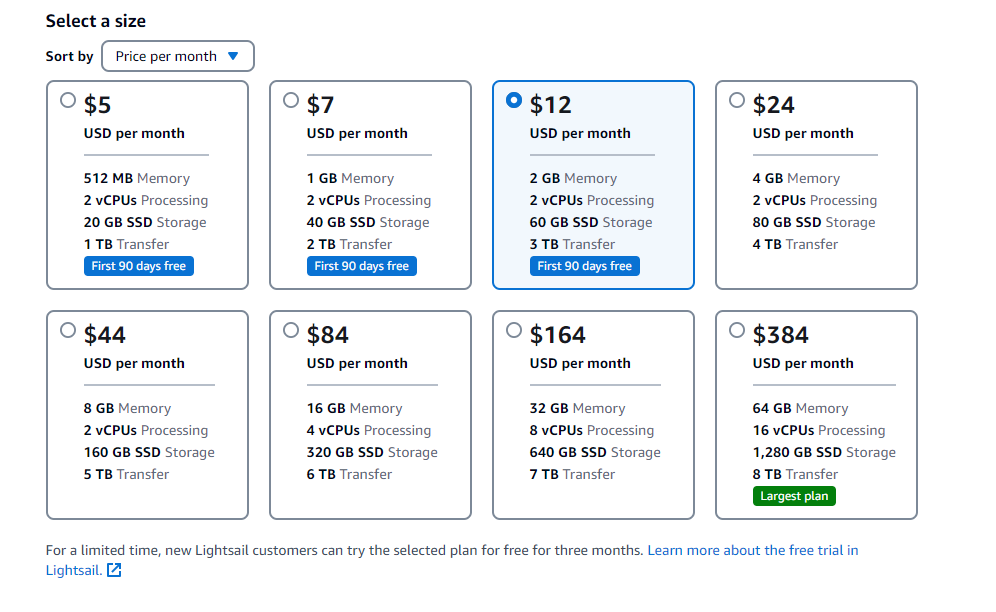
Step 7: Choose an Instance Plan
Select an instance plan that suits your needs. Make sure it has at least 1 CPU and 2 GB of RAM.
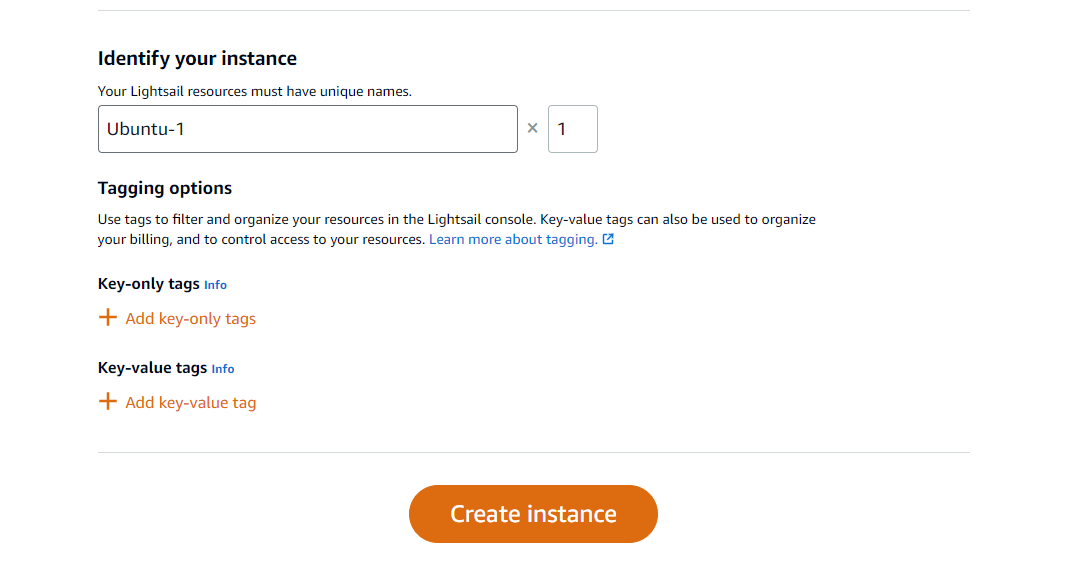
Step 8: Name Your Instance and Create It
Give your instance a name, then click Create Instance to finalize the setup.
Configuring Your AWS VPS
Once your VPS is created, follow these steps to configure it for connection:
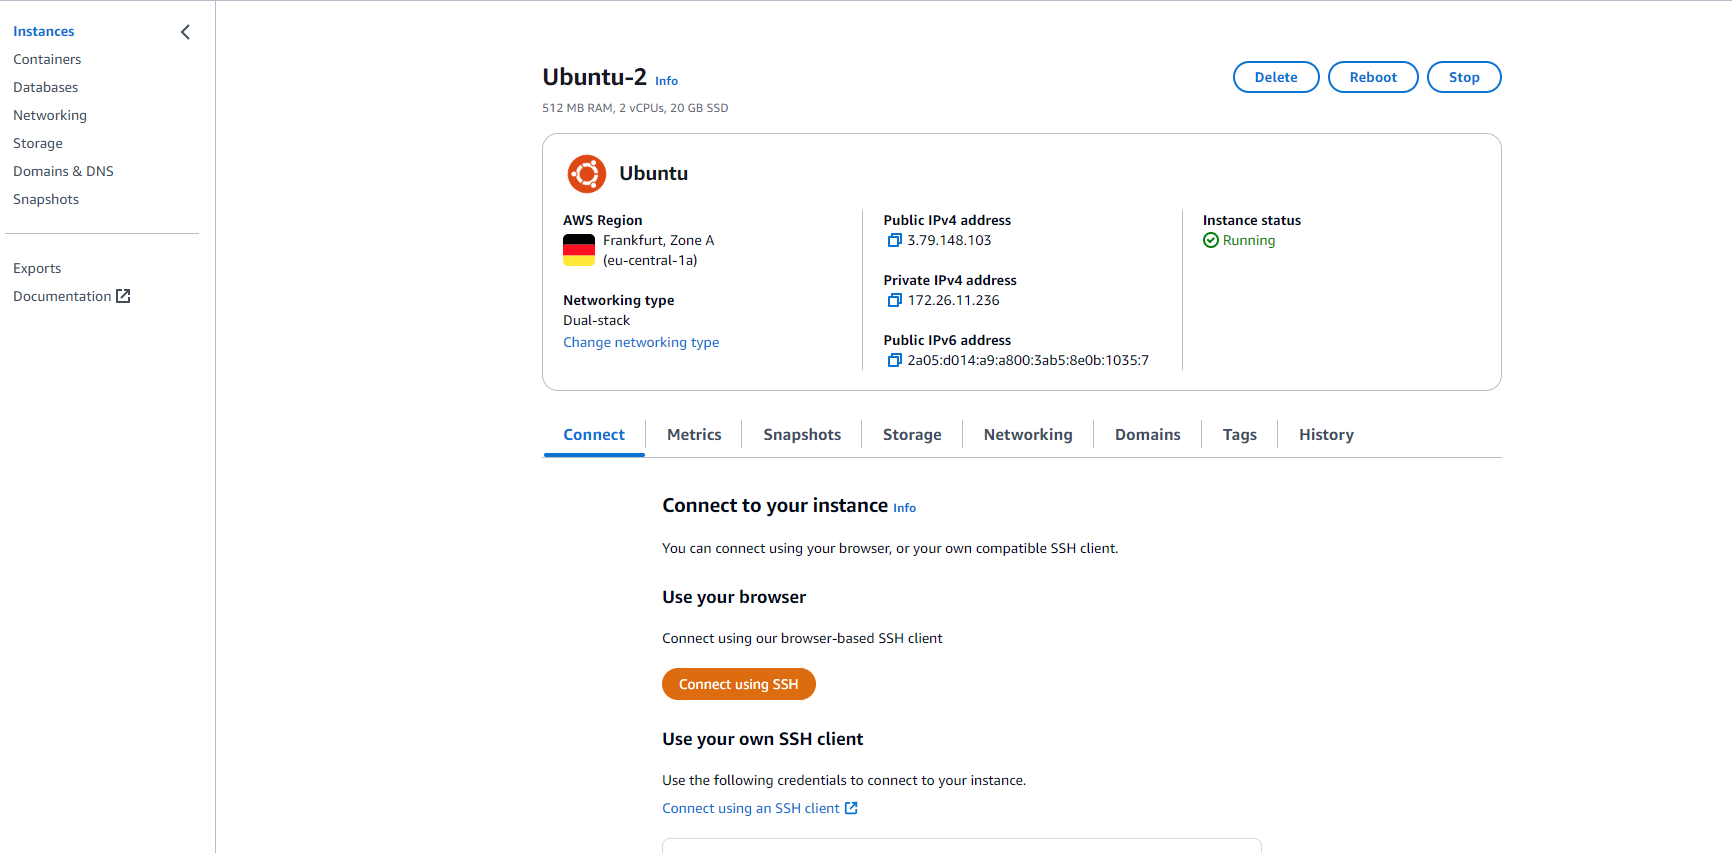
Step 1: Open Instance Settings
Access the instance settings by clicking on your VPS in the AWS Lightsail dashboard.
Step 2: Go to Networking Settings
In the instance settings, navigate to the Networking tab.
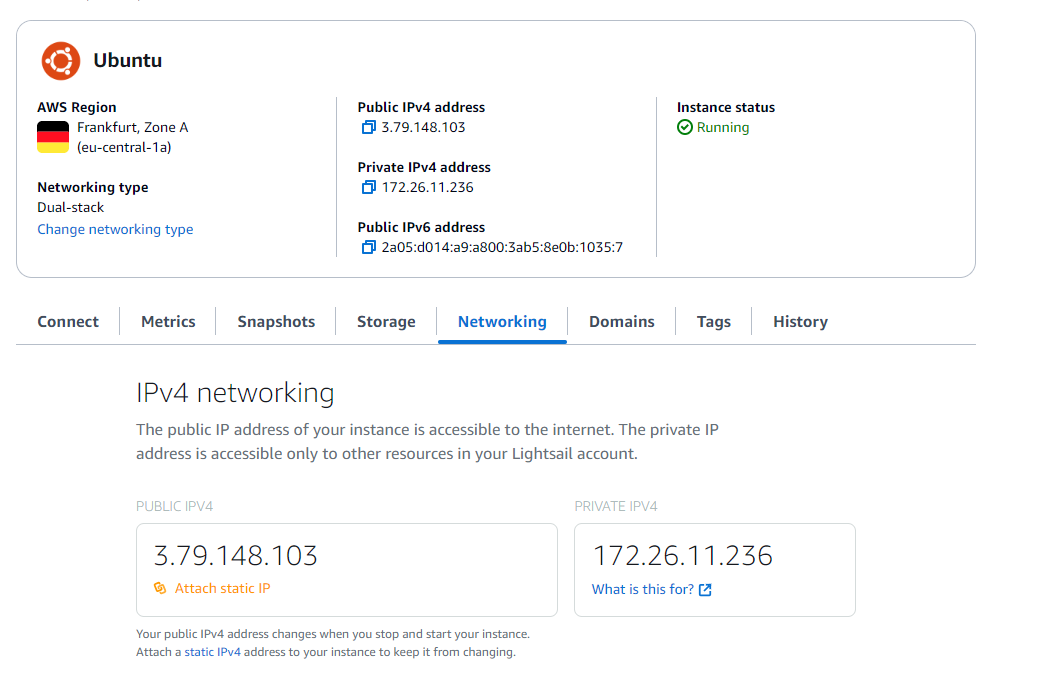
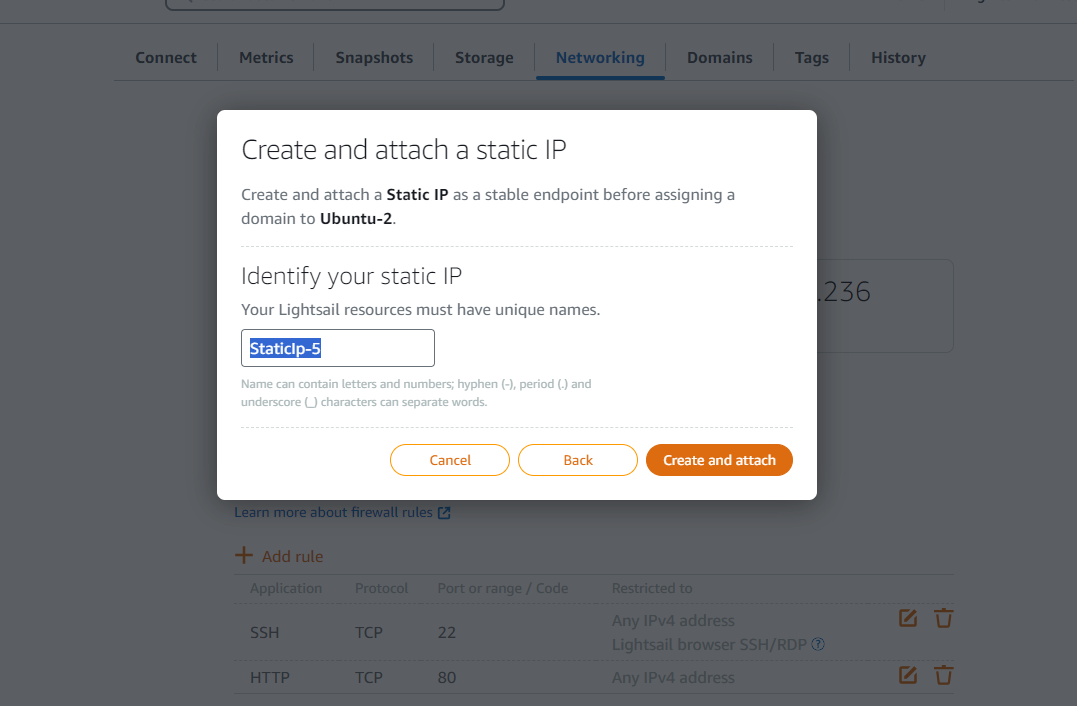
Step 3: Attach a Static IP
Attach a static IP address to your instance to ensure it remains consistent.
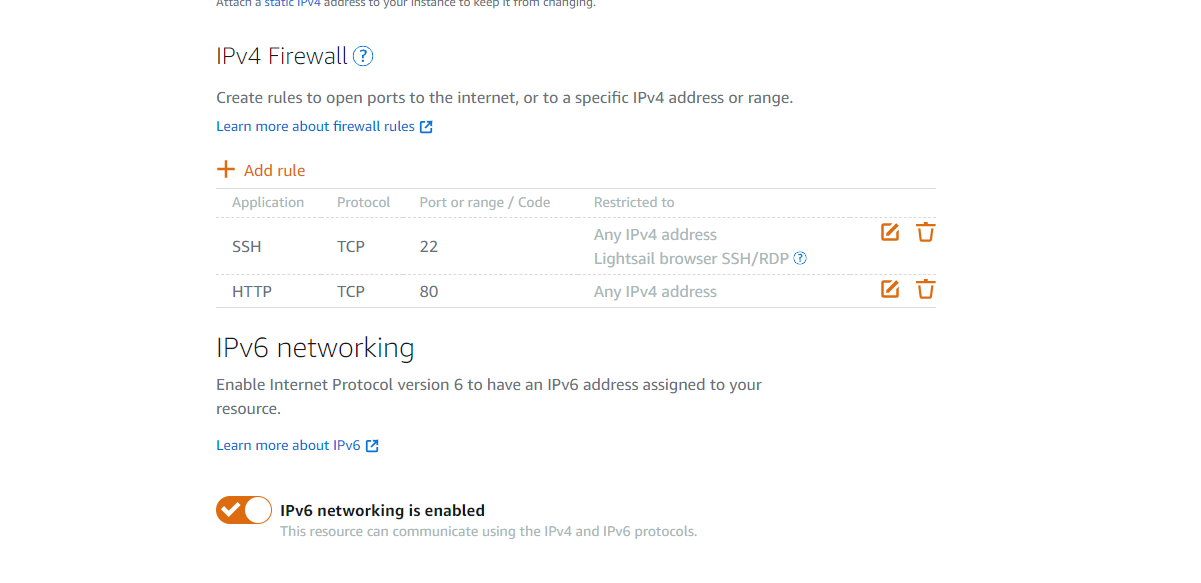
Step 4: Configure the IPv4 Firewall
Open the necessary ports on the firewall. You can open all ports or only port 6443 for the connection.
Connect Your AWS VPS to the UBOS Platform
After setting up and configuring your AWS VPS, you are now ready to connect it to the UBOS platform. This final step will guide you through gathering the necessary information for the connection and completing the process.
Step 1: Gather Connection Details
To connect your AWS VPS to UBOS, you'll need the following information:
- Public IP Address: This is the external IP address of your VPS.
- SSH Username: The username you'll use to access your VPS, typically
rootor a user with administrative privileges. - SSH Key: The private key used to authenticate your SSH connection (you should have downloaded this earlier).
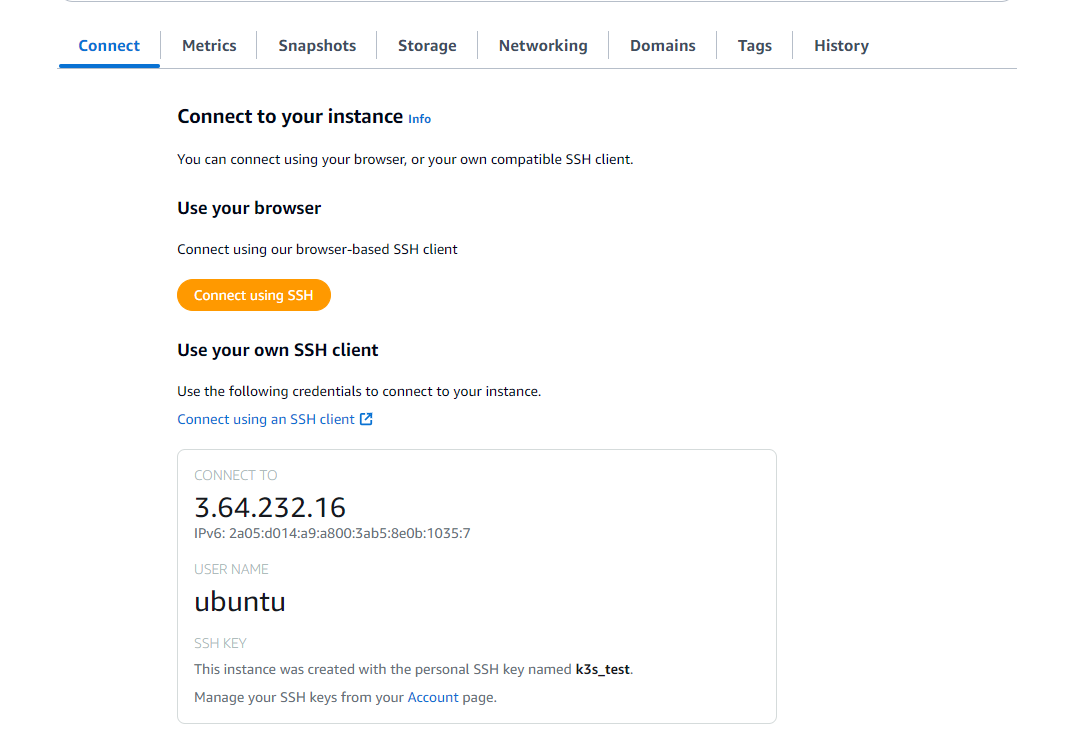
You can find the Public IP Address and SSH Username by following these steps:
- Go to the Connect tab of your instance in the Amazon Lightsail console.
- The page will display both the IP address and username needed for the connection.
If you're unsure how to retrieve the SSH key or missed the earlier steps, refer back to Step 5: Add or Generate an SSH Key Pair to learn how to generate or add an SSH key.
Step 2: Input the Information in UBOS
Navigate to User Settings:
To begin, go to the User Settings tab by clicking on the "User Settings" icon in the lower left corner of the workspace screen.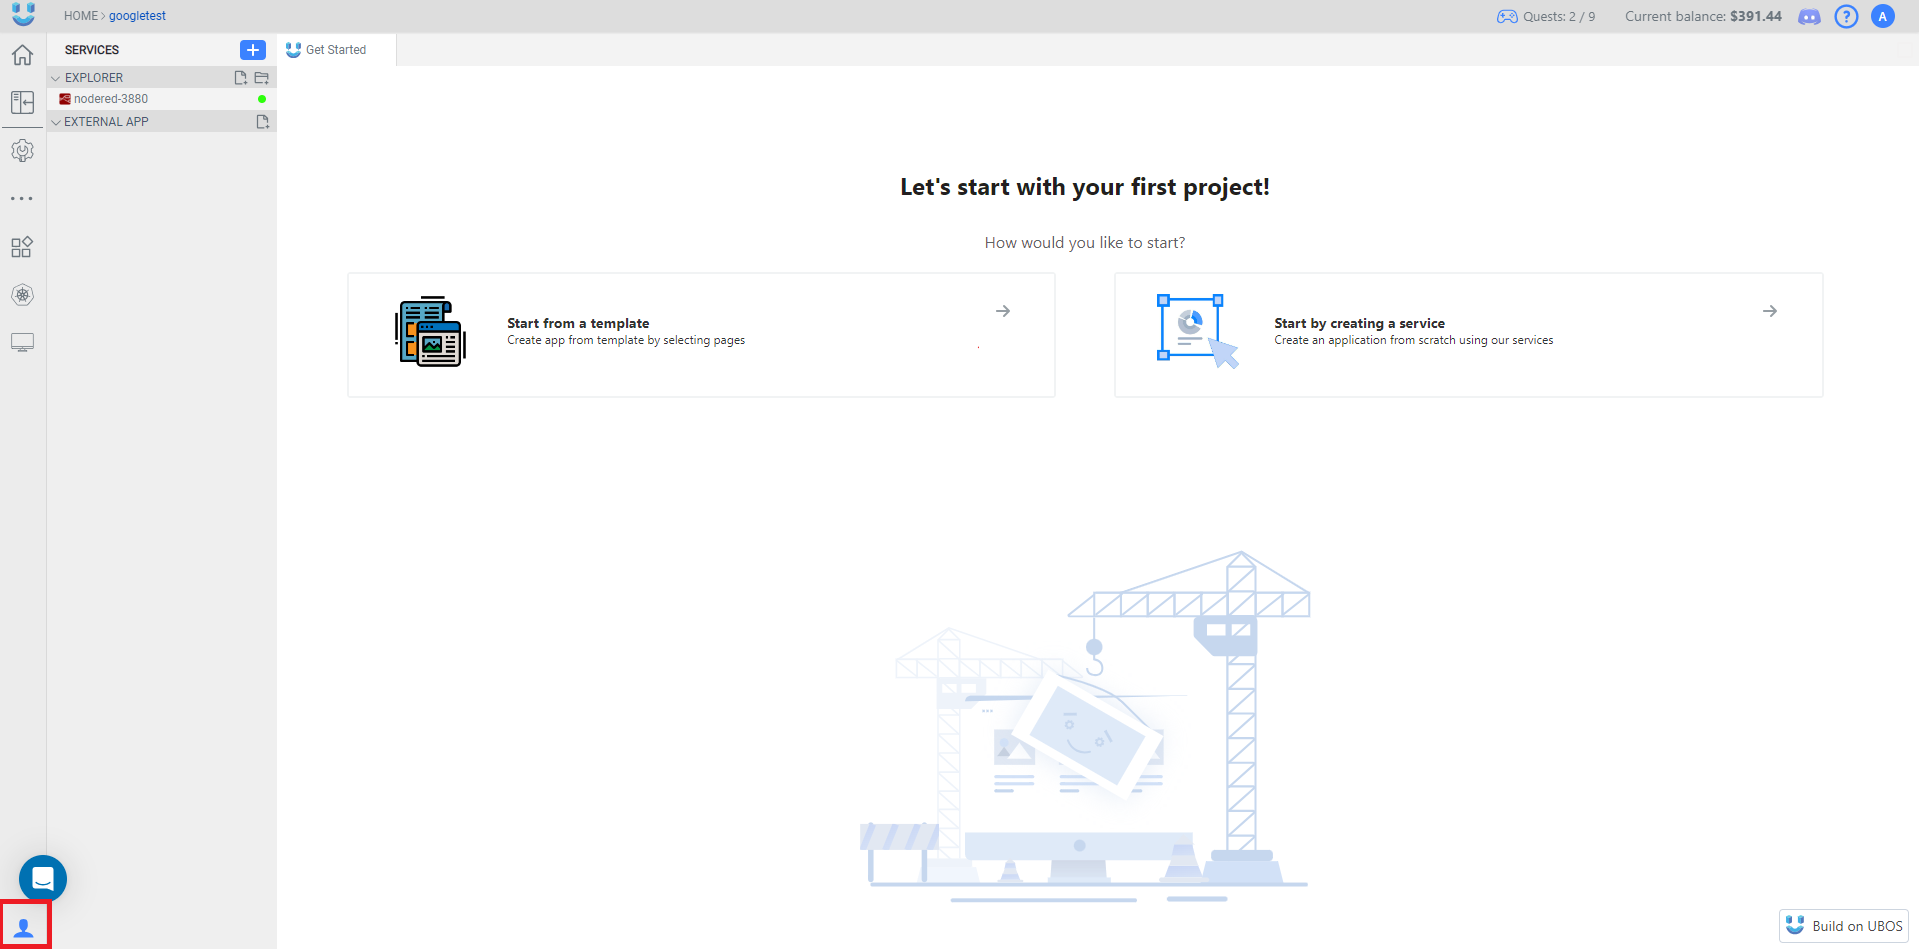
Open "Your Servers" Page:
Once you're in the User Settings tab, click on the Your Servers option in the menu.
Add a New Server:
Now, click the Add New Server button to start connecting your VPS.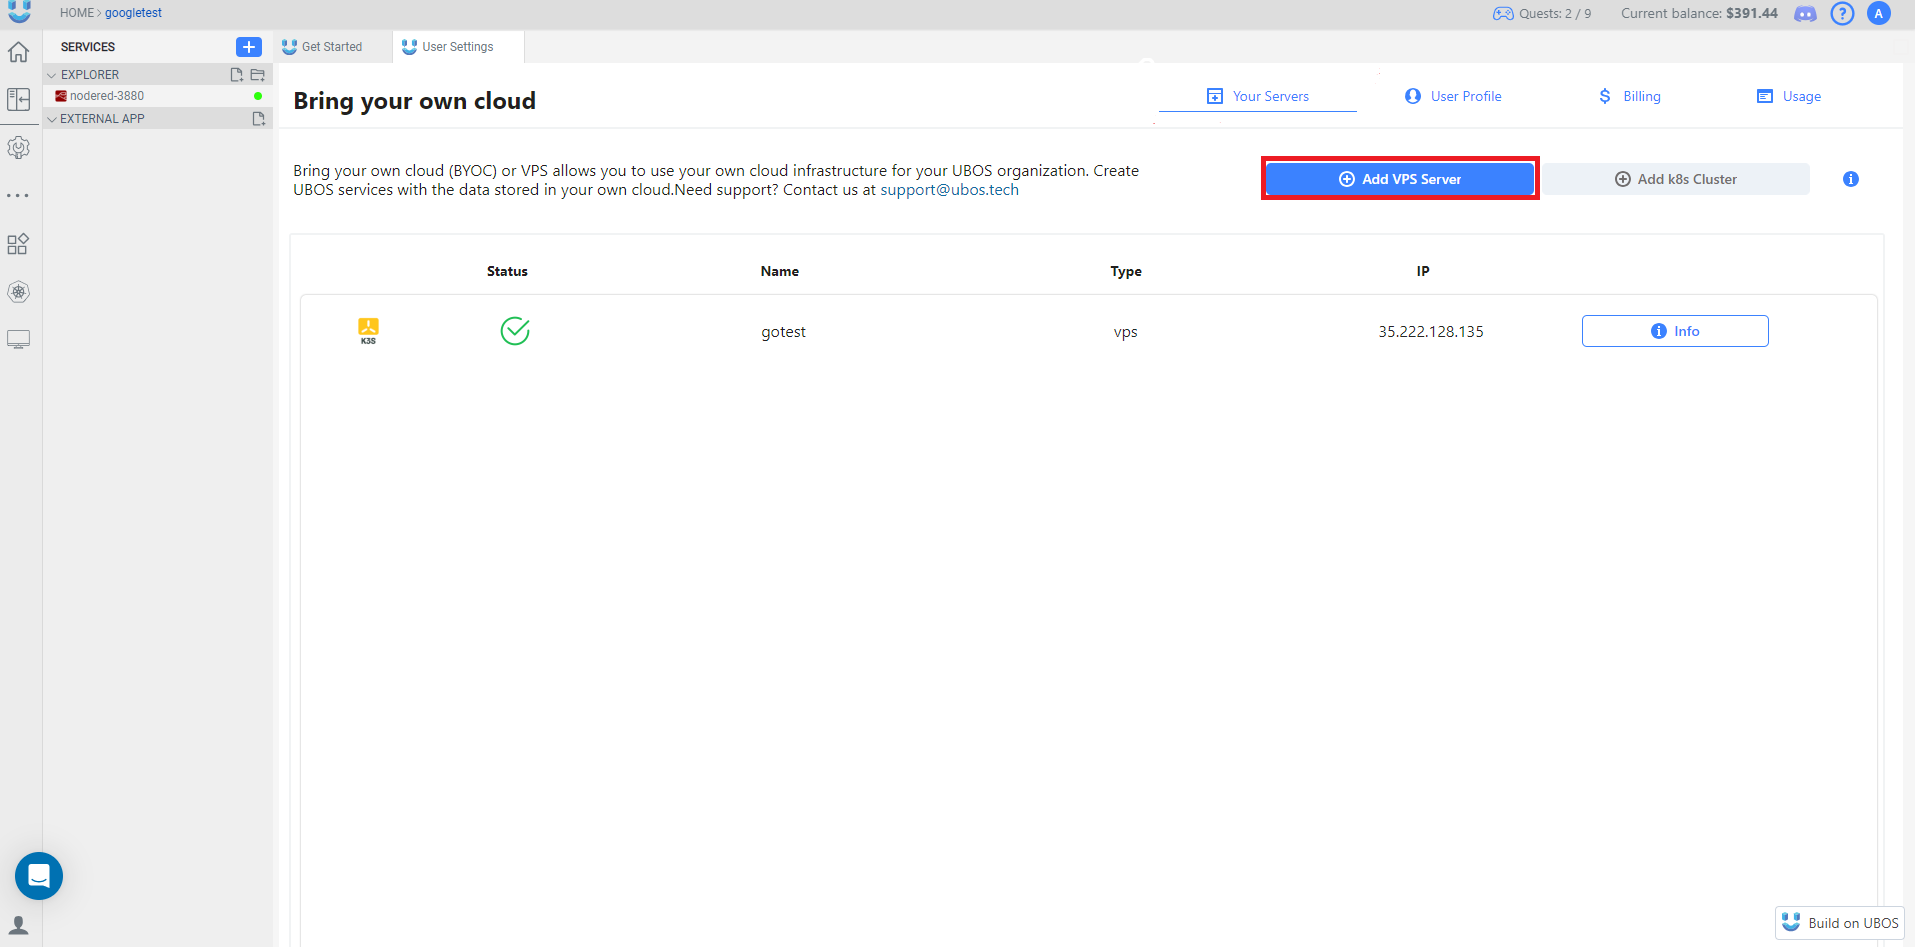
Input the Server Details:
This will open the interface for adding your server details. Fill in the following fields:Field Description Name/Subdomain Choose a name or subdomain to identify your server within UBOS. IP Address Enter the public IP address of your AWS VPS. Port Use the default SSH port (22) unless you’ve configured a different one. User Input the SSH username you retrieved from the Connect tab. Private Key Select or add the SSH private key used for authentication. 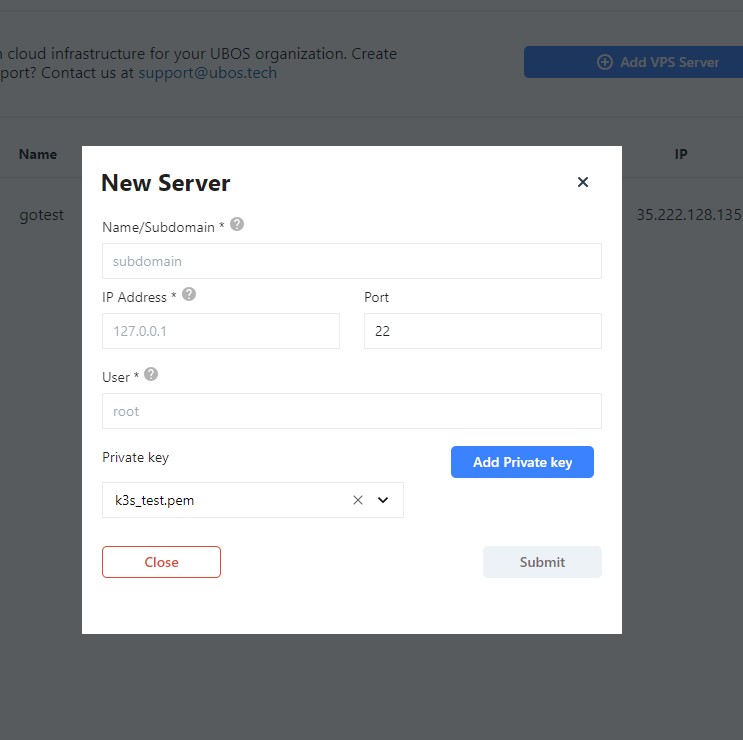
Step 3: Finalize the Connection
After filling out all the required fields, click Submit to complete the process.
Your AWS VPS is now successfully connected to the UBOS platform, allowing you to manage and run your services and applications. To check the status of your connected AWS VPS, visit the Your Servers page under User Settings, where you will find a table displaying all connected VPS instances along with their current status.

For any issues or further clarification, you can revisit the earlier steps on this page, or reach out to our support team for assistance.
For more details on how to use your connected VPS, visit Attach Your Workspace