Publish template
UBOS offers a solution that allows you to create your own templates with ease and speed. In this article, we will consider the process of creating your own template on UBOS, which will consist of a frontend and a backend part.
Step 1. Publishing the project on GIT
Our template consists of UI and Node Red. These are two different services that need to be connected to GIT.
Templates developed by our team are stored on GitHub but you can also use GitLab
namespace: ubos-template-AI-task-manager-UI / ubos-template-AI-task-manager-NR
Step 2. Publication of the template on the UBOS platform
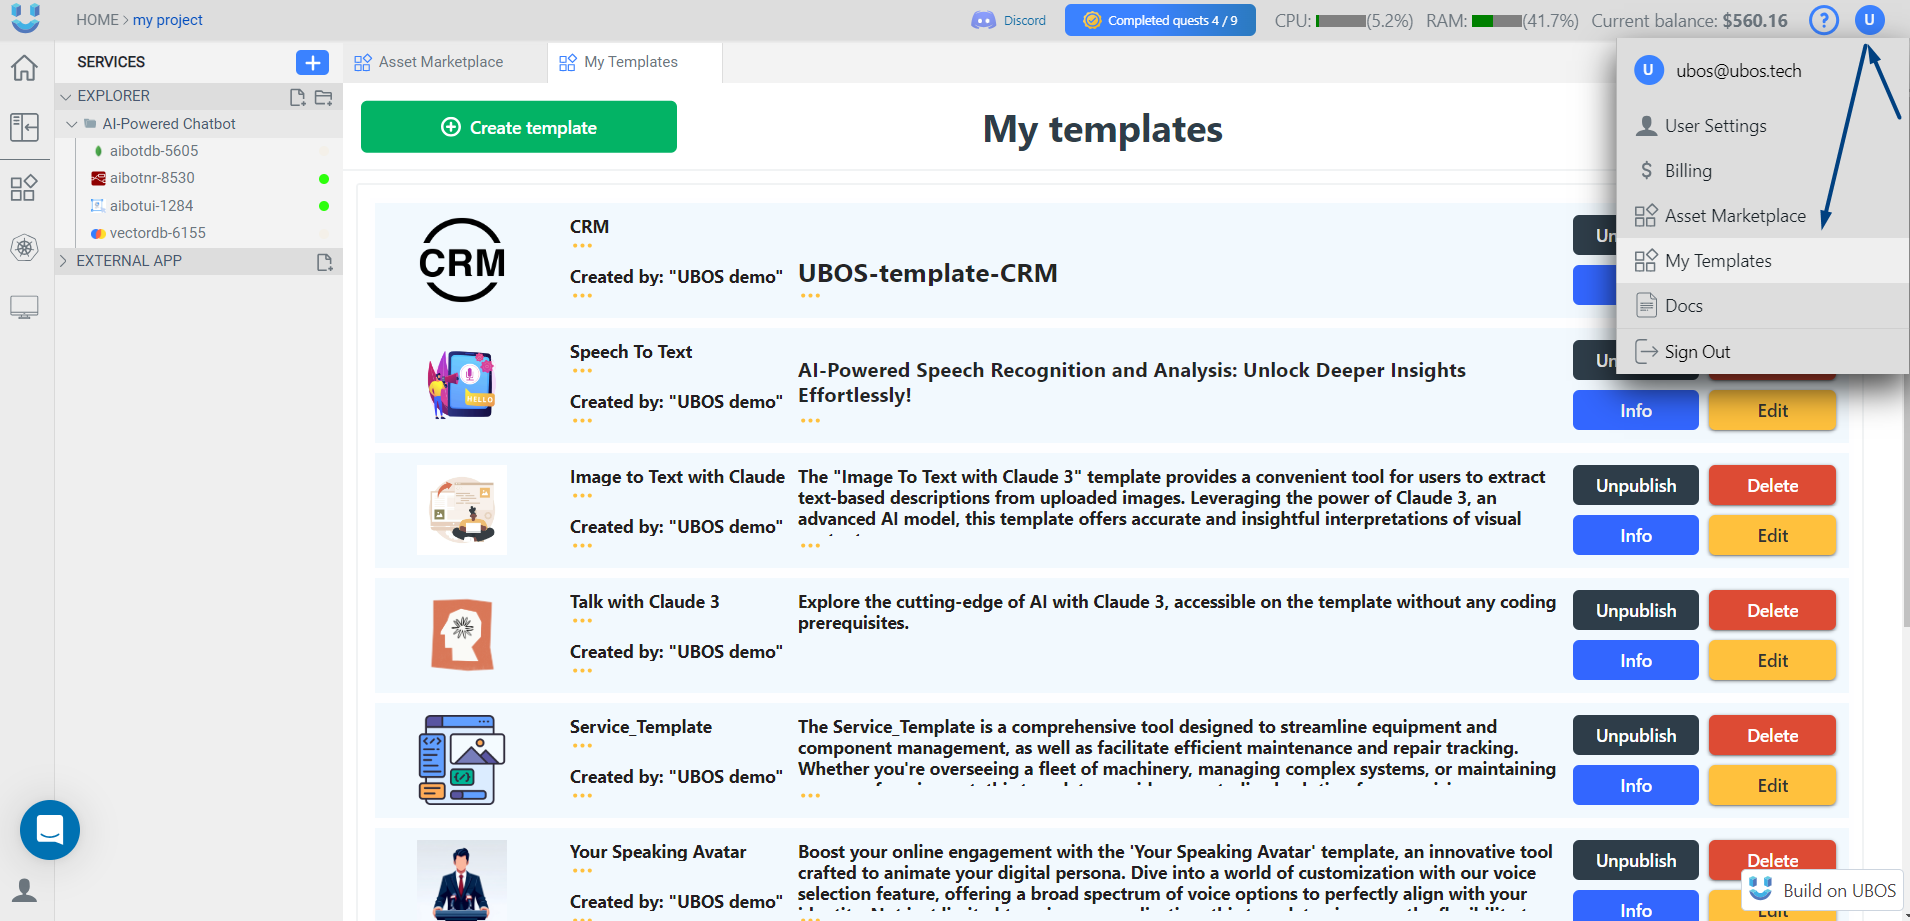
2.1. Open create template page
You need to open the Template Manager. Here you will see a list of all published templates. Select My templates from the menu. On this page you will see a button Create a template. Click on it.
2.2. Create template page details
This is the template creation page. Here you need to fill in all the information about the template you have designed.
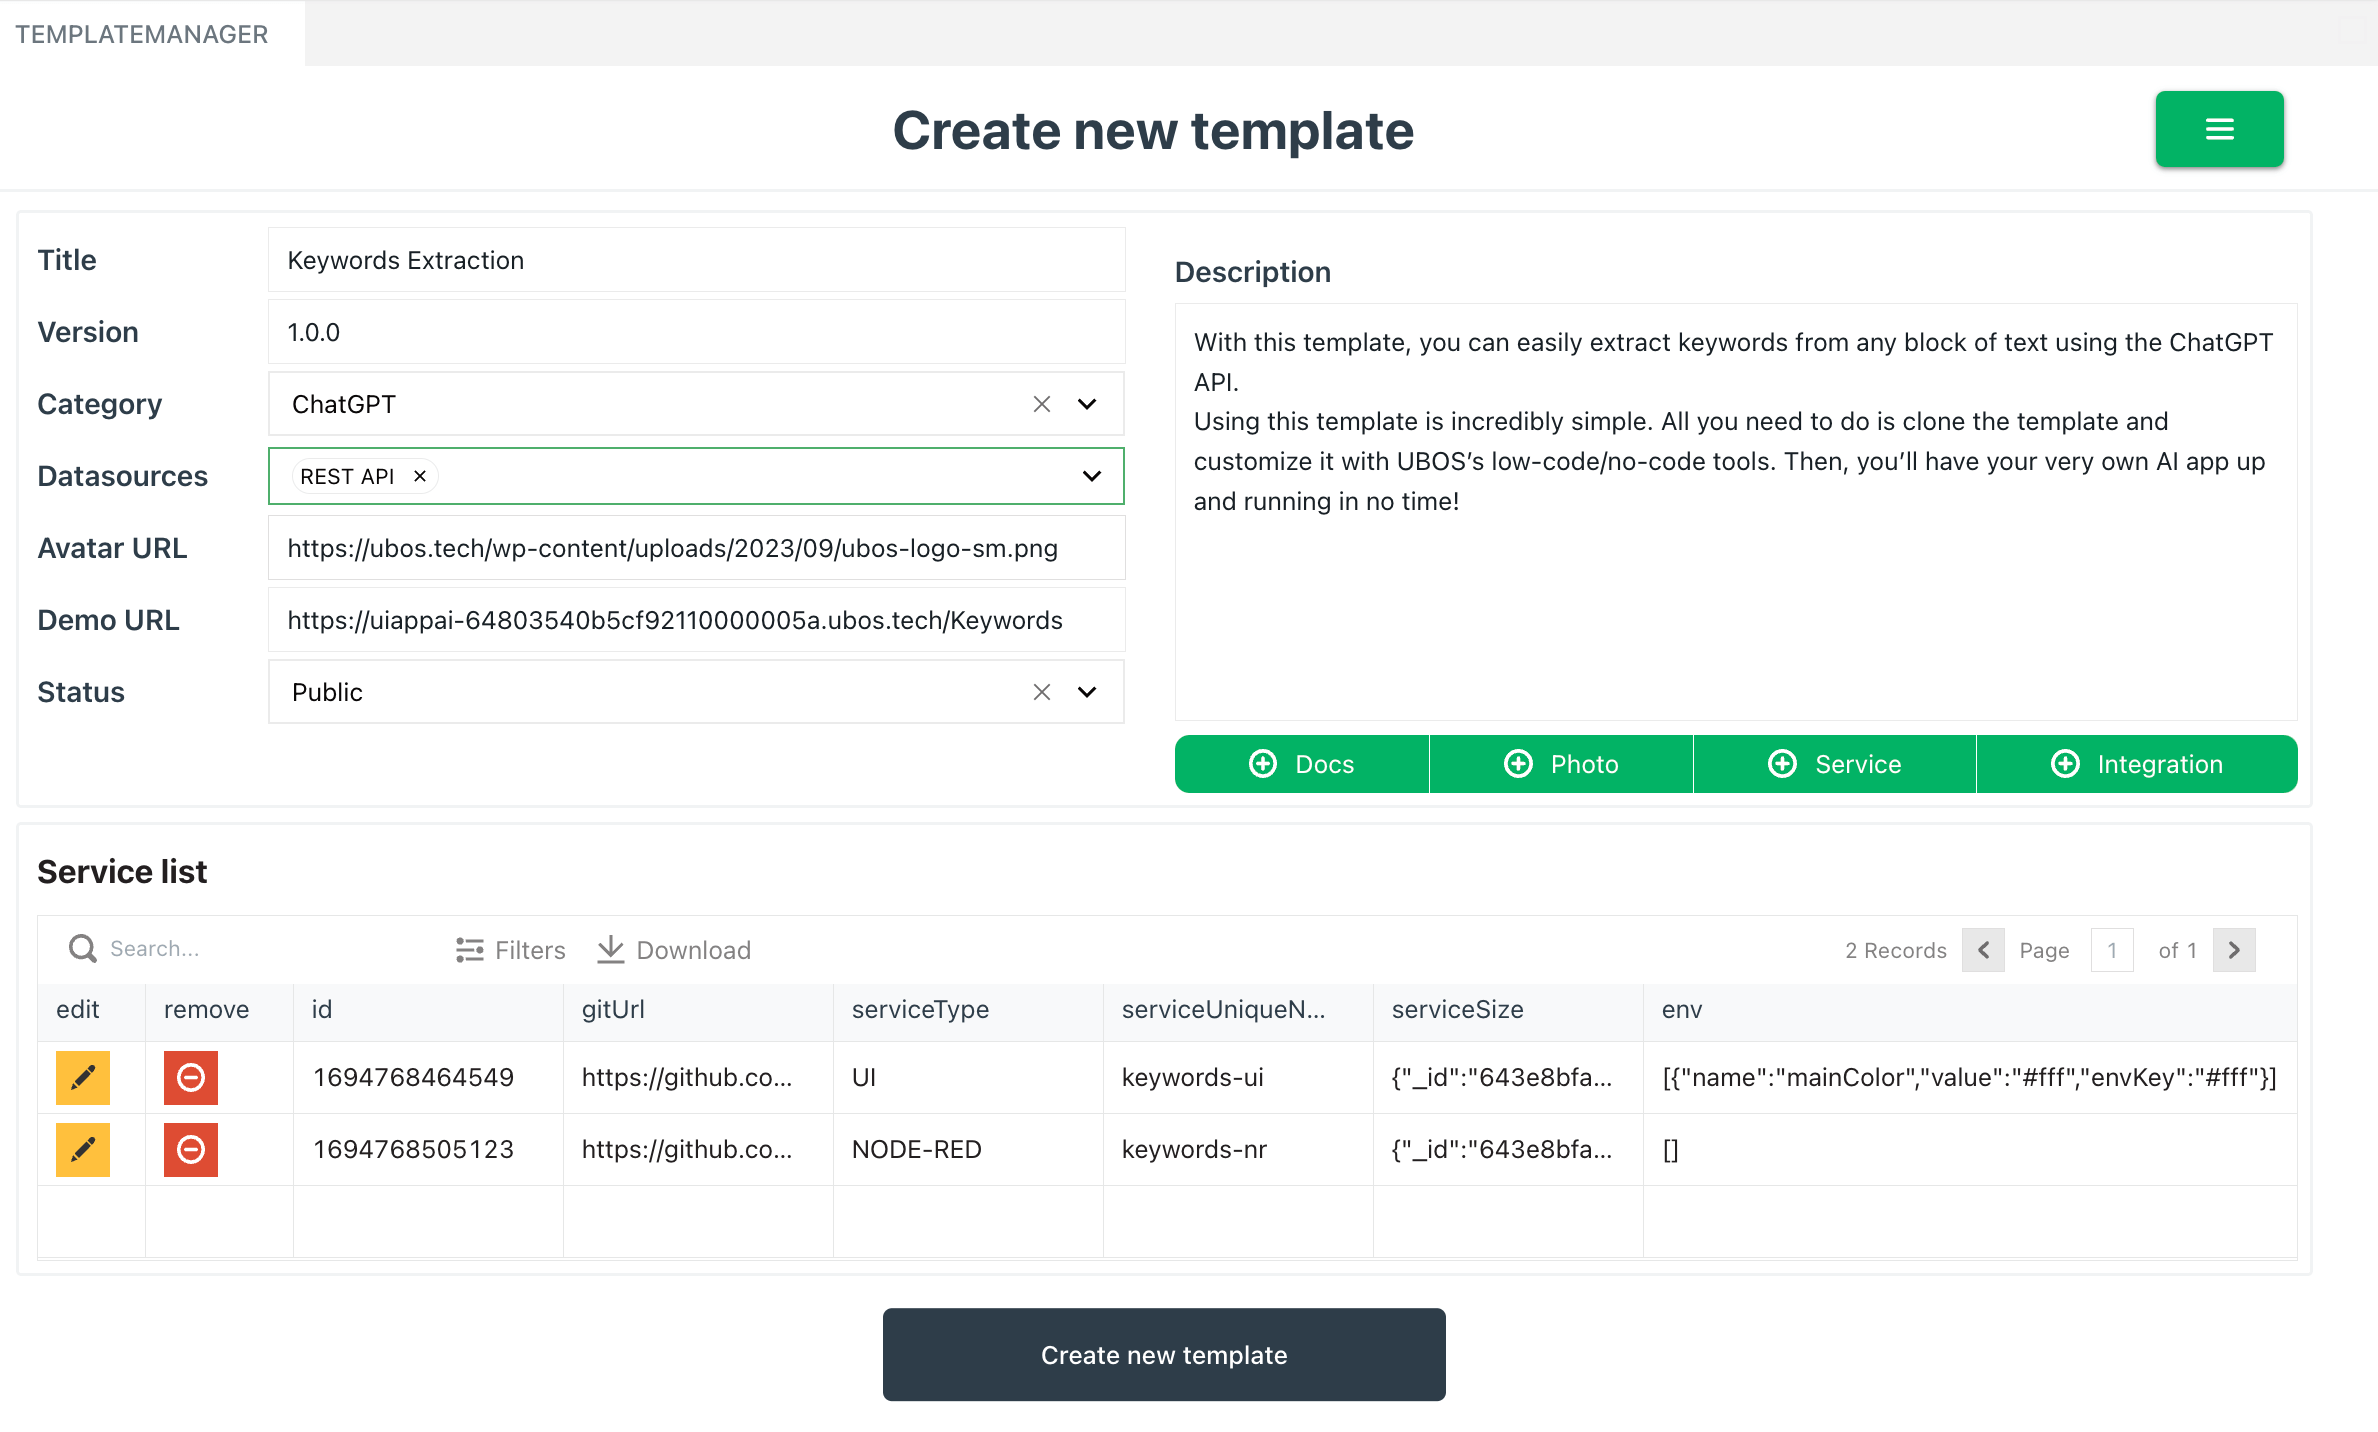
Title: template nameVestion: template versionCategory: template category (you can sort all templates by it)Data source: general information about what your template consists ofAvatar url: image templateDemo url: link to the demo version of the template (if this field is filled in, the user will be able to see how the template works in the template details)Status: if the template is public, each user can see it and use it. If the template is private, you should add the mail of those users to whom it will be availableDescription: general description of the template
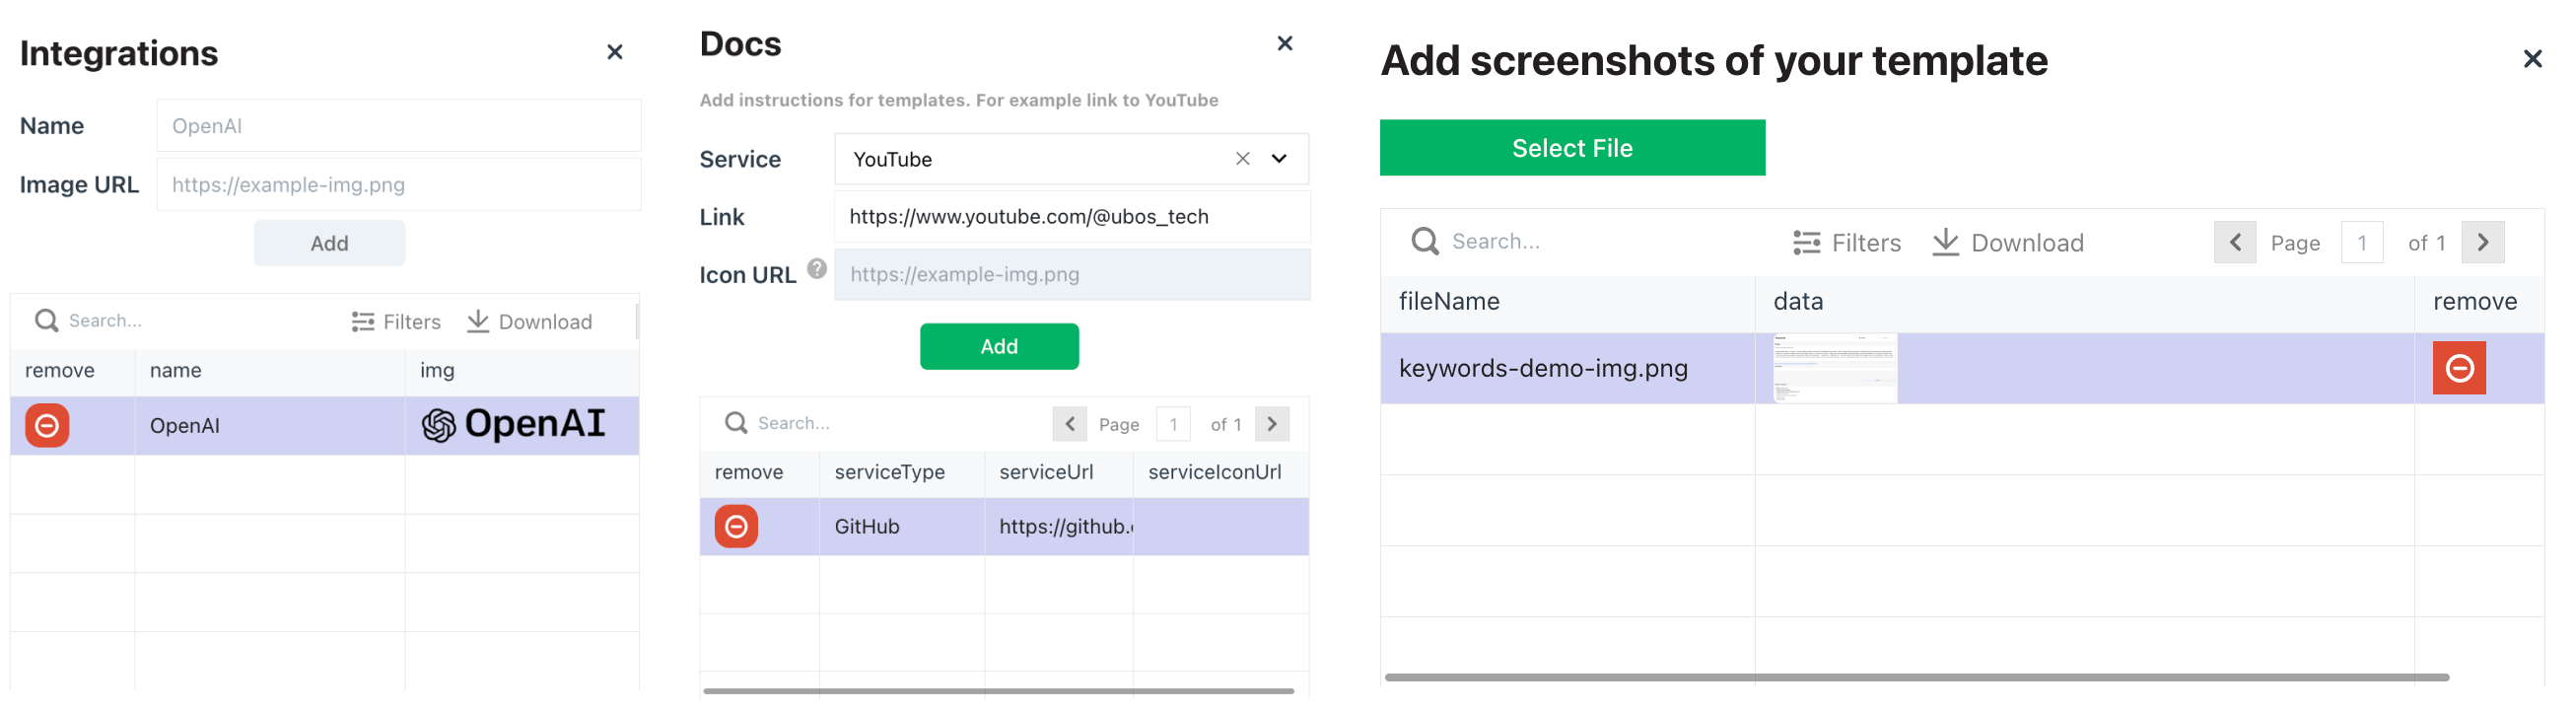
Let's take a closer look at the functional buttons.
Integration: here you need to insert a link to the logos of the systems with which you made the integration.Docs: here you can add more additional information about the template. For example, a YouTube video, a link to GitHub, or a link to an article about this template.Photo: here you need to upload screenshots of what the template looks like.
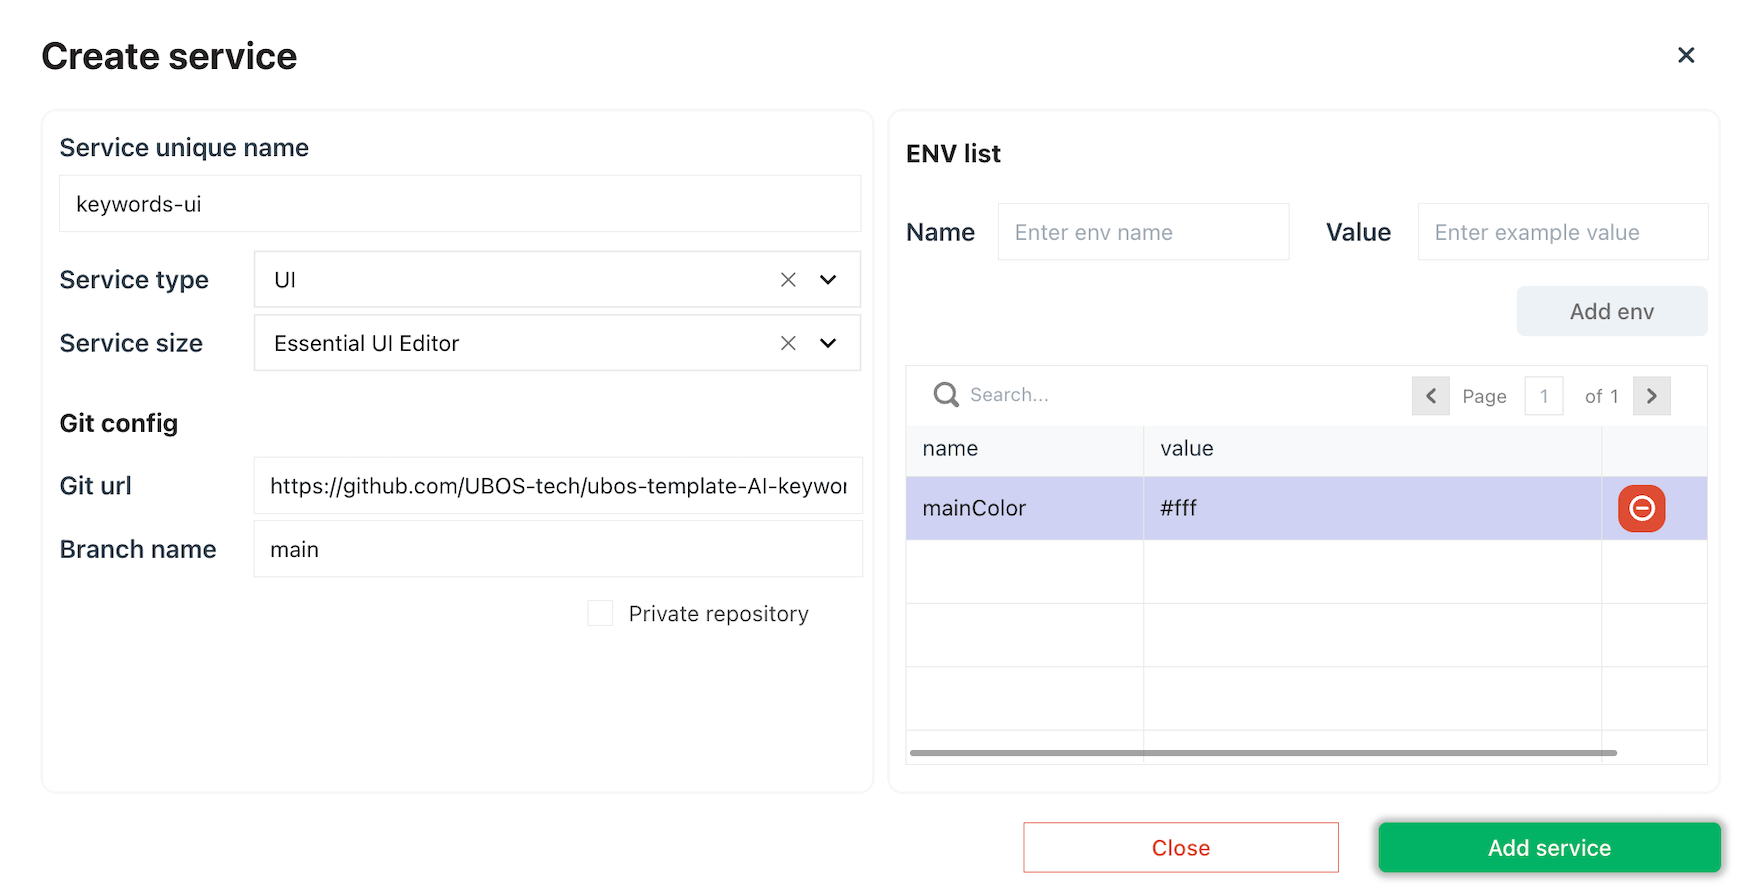
Services: here you need to add the services that will make up your template. Let's go into more detail- Service unique name - the name of the service (for example, chat-ui)
- Service type - There are currently three types of services available. UI, NodeRed, MongoDB
Each service has a size. There are 4 sizes in total: Essential, Small, Medium, Large If you chose UI or Node-Red, you need to add a link to the repository where the branch name template is stored. If the repository is private, you need to specify the User name and access token of the repository owner.Also, if necessary, you can add ENV for UI and Node-red services.
Be sure to review the ENV settings for creating a template. Check this article.
Next, click Add service button. A template can consist of any number of services.
Check if all fields are filled in correctly. Edit if necessary. If everything is fine, click Create new template button. The created template is initially displayed only in the My Templates page.
2.3. My templates page
On the My templates page, you need to find the desired template and publish it. To do this, you need to press the Publish button. Once published, your template will appear in the list of all templates. You can hide the template at any time. To do this, you need to go to My Templates and click the UnPublish button. You can also edit the template information at any time. To do this, on the My template page, click the Edit button on the template to be edited (the template editing page is similar to the creation page). New changes will be available only after install new template. Users who have already downloaded the template do not receive your updates
More about creating template.